As a teacher, a lesson plan is an invaluable tool for teaching. A lesson plan is a document that assists the teachers in organizing their lesson material, as well as helps them assess the overall learning experience of the students. Teachers plan their lessons ahead of time using a lesson plan template. A well-organized lesson plan will ensure clarity regarding the material being taught, and the students and the teacher can keep track of the different modules throughout the lesson plan.
It outlines the tasks and activities involved in the lesson, the objective of the material being taught, a clear timeline of how the teacher and students will progress through the lesson, and a detailed list of the materials and resources to be used for the lesson. It also lets the students know how they will be assessed for each module and the lesson. You can use variations depending on whether the lesson will be done over a day, a week, or a couple of months.
Why is Lesson Planning Important?
The purpose of creating a lesson plan is for the teacher to make the most out of their time with their students, ensuring they are as prepared as they can be. It also helps to adapt to unexpected issues as you progress through the lesson plan. It is a beneficial tool if you have students who learn at different speeds, allowing you to create a balanced plan that all students will understand. Each lesson plan that you create should build upon the previous lesson in a seamless manner.
Advantages of using a lesson plan
There are benefits for both teachers and students when using a well-planned lesson plan. Lesson plans will ensure the students’ success and contribute to the teacher’s success. Creating a successful lesson plan means that you, as an educator, have achieved your goal of supporting your students.
There are four ways in which a lesson plan can be beneficial:
Boosts your confidence
When you have a lesson plan, it lets you stay in control of how the lesson flows. This gives you more confidence in your ability to relay what is needed for each lesson. When you look confident, it inspires students, who can remain focused on what they are learning and stay on top of things.
Evaluate your lessons
Using a lesson plan allows you to review how well the plan worked. By evaluating the lesson plan, you can make changes that will improve your performance as a teacher. In addition, you can review the teaching methods you have used and see if a different method may work better for future planning.
Organization
The main goal of a lesson plan is to keep things organized so that the lesson doesn’t get off track. In addition, it gives you and your students a visual of the steps that will need to be followed as you move through the lesson. When a lesson is not organized correctly, it opens the door for students to fall behind, not understand the lesson, or misbehave due to a lack of focus.
A guide for substitute teachers
If you have ever had a substitute teacher fill in for a class, you may have seen that they were not adequately prepared, letting students have a free period rather than carry on with the lesson they were learning. A lesson plan is an excellent tool for substitute teachers because it lets them pick up where the original teacher left off.
Types: 5 Types of Lesson Plans
A lesson plan can vary from one class to the next and will depend upon some key factors, such as how complex the lesson is, whether you want to plan things far ahead, and the grade level of the students you teach.
There are five main types of the lesson plan that you can use:
Daily
A daily lesson plan covers what will be learned on each day of the week. This means that you will create five separate plans per school week. This type of lesson plan is best when you will be covering a different topic each day. It will outline the lesson’s objective and typically has an assessment after the lesson for that day to help see if the students understood the objective and the material taught.
Weekly
A weekly lesson plan will cover one whole week and allow five consecutive periods to be covered and completed by the end of the week. This is a good lesson plan for topics that will take more than a day to cover. Materials and content are taught at the start of the week. Then, in the middle of the week, students will have the opportunity to implement what they have learned with a test or assessment at the end of the week to see how well the students have understood the material.
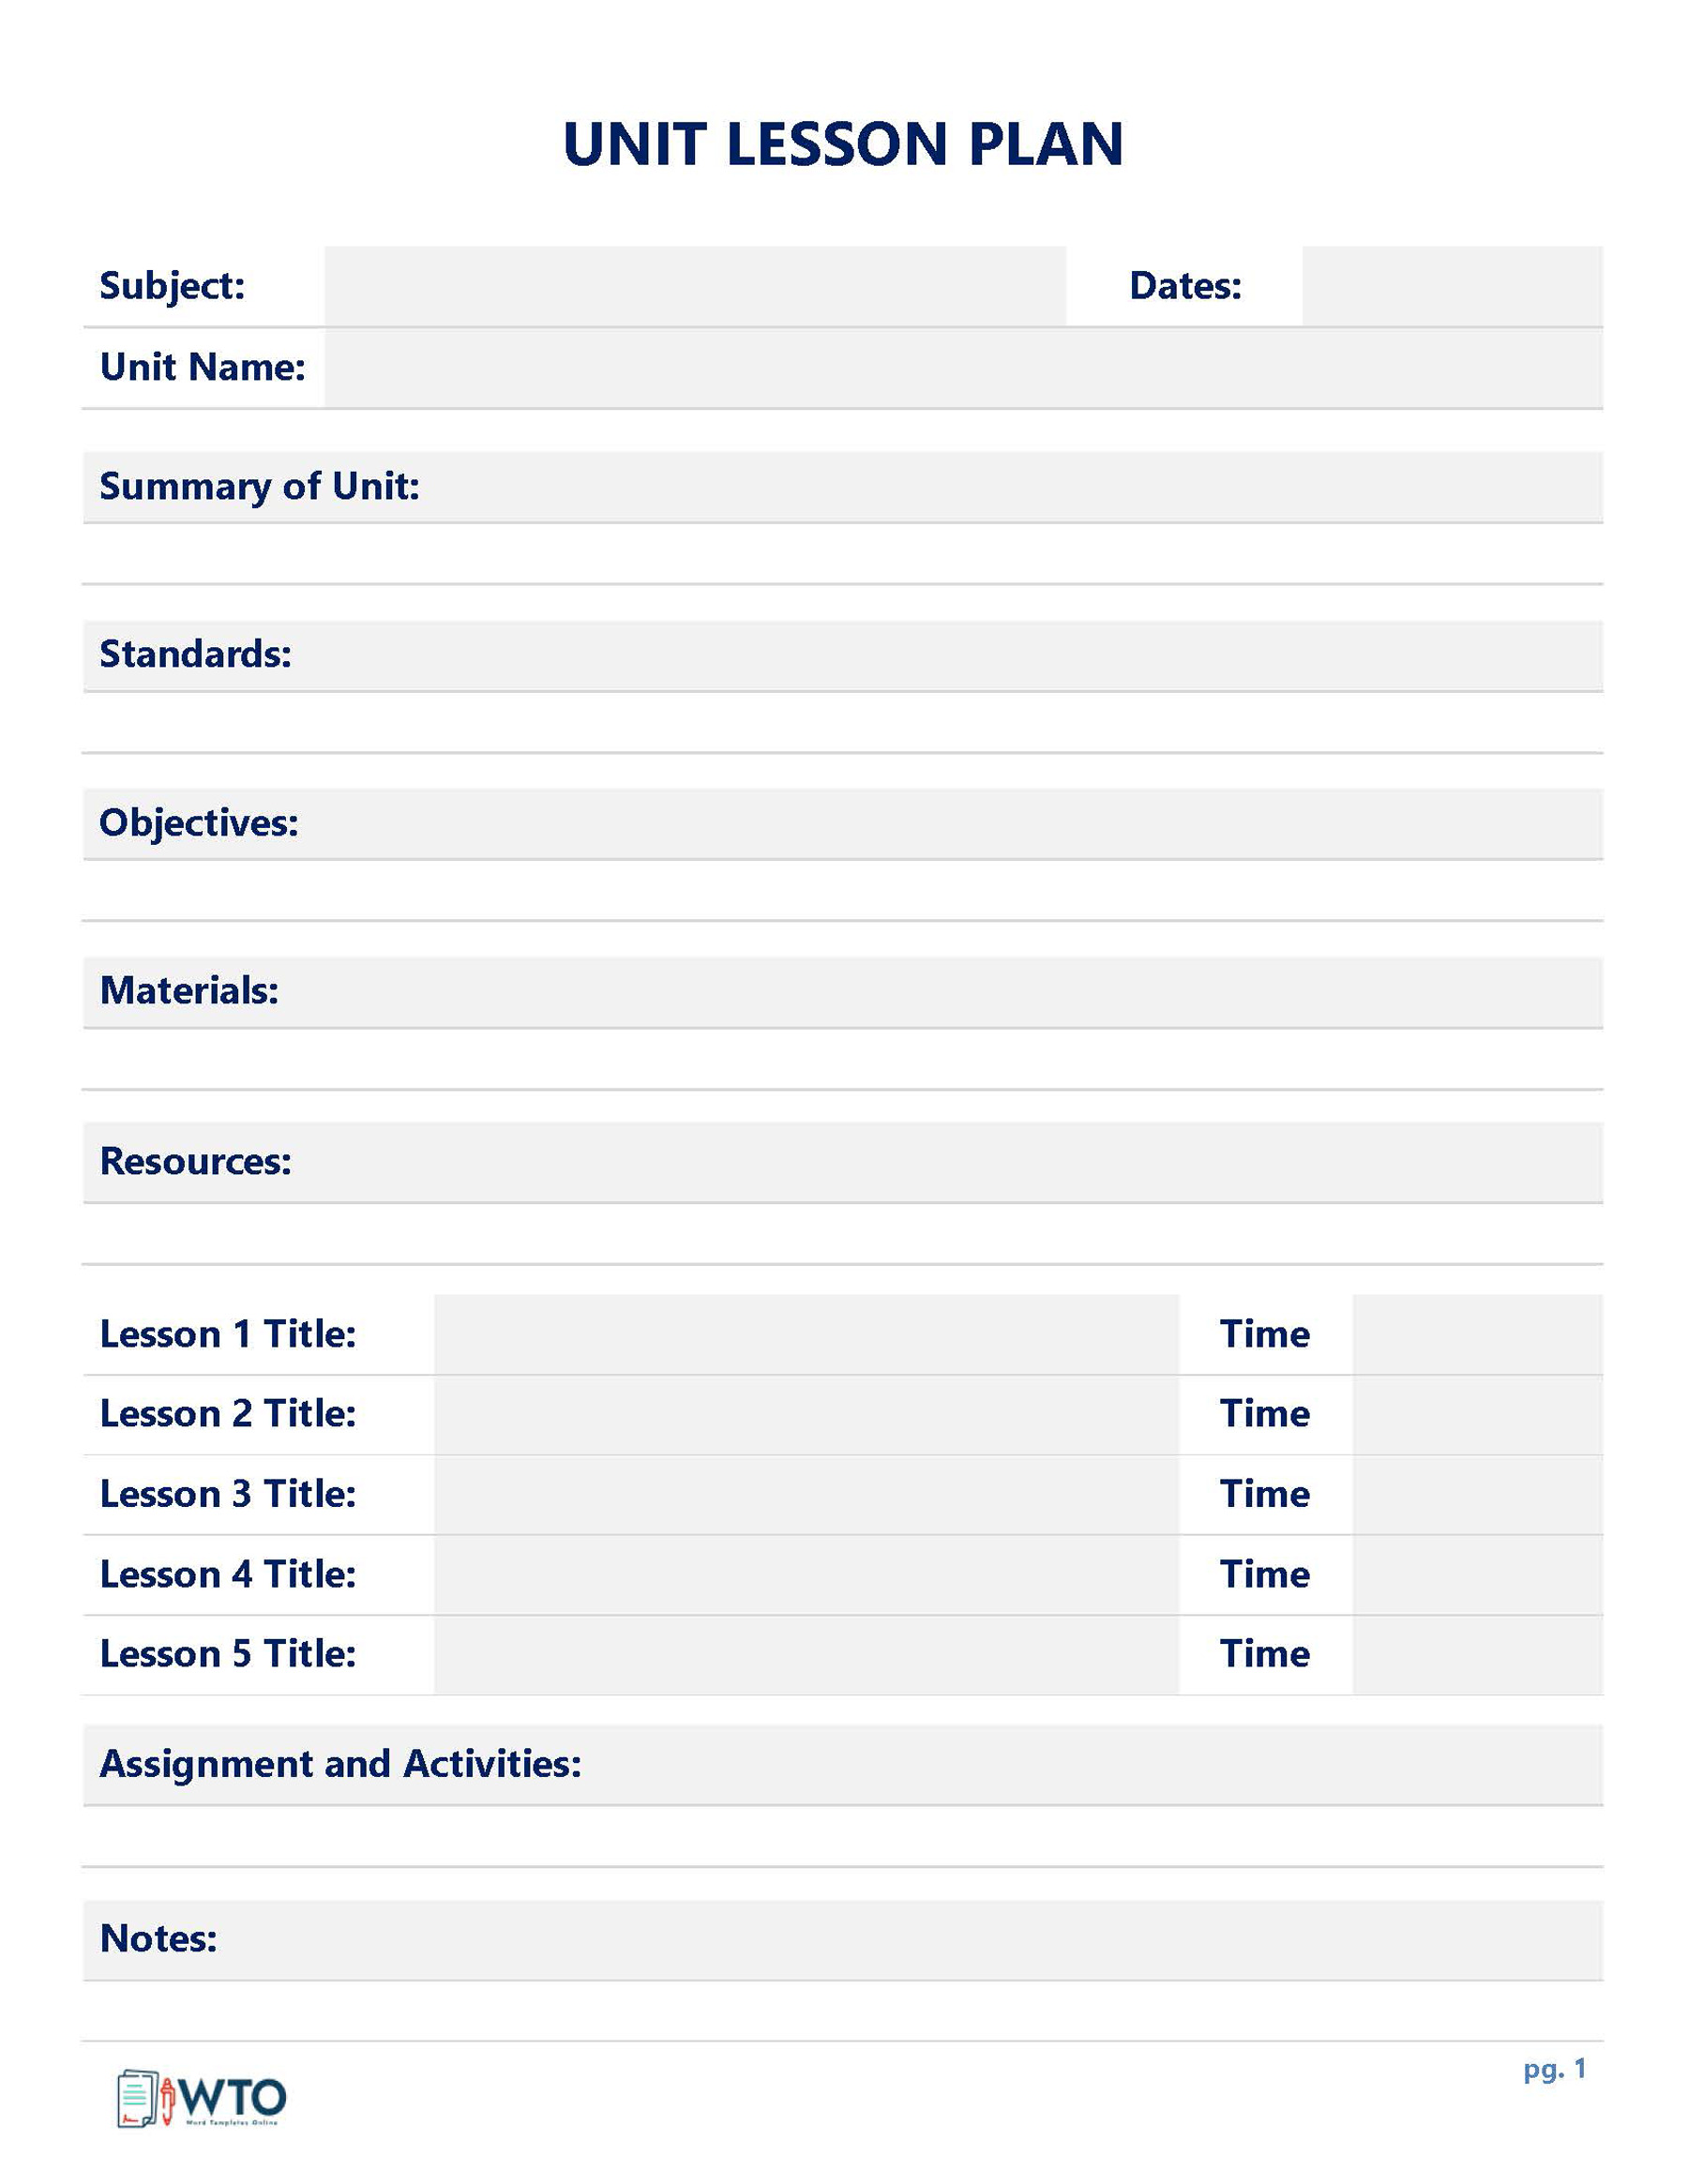
Unit
A unit lesson plan covers the duration from two weeks to two months, depending on the complexity of the class. In addition, a unit lesson plan covers a broader range of content and lets the teacher set the pace of learning by assessing how much time will be needed for each topic in the unit. This is a perfect lesson plan when you have to teach the same material to different class levels, allowing you to adjust time frames according to the student’s ability in different classes.
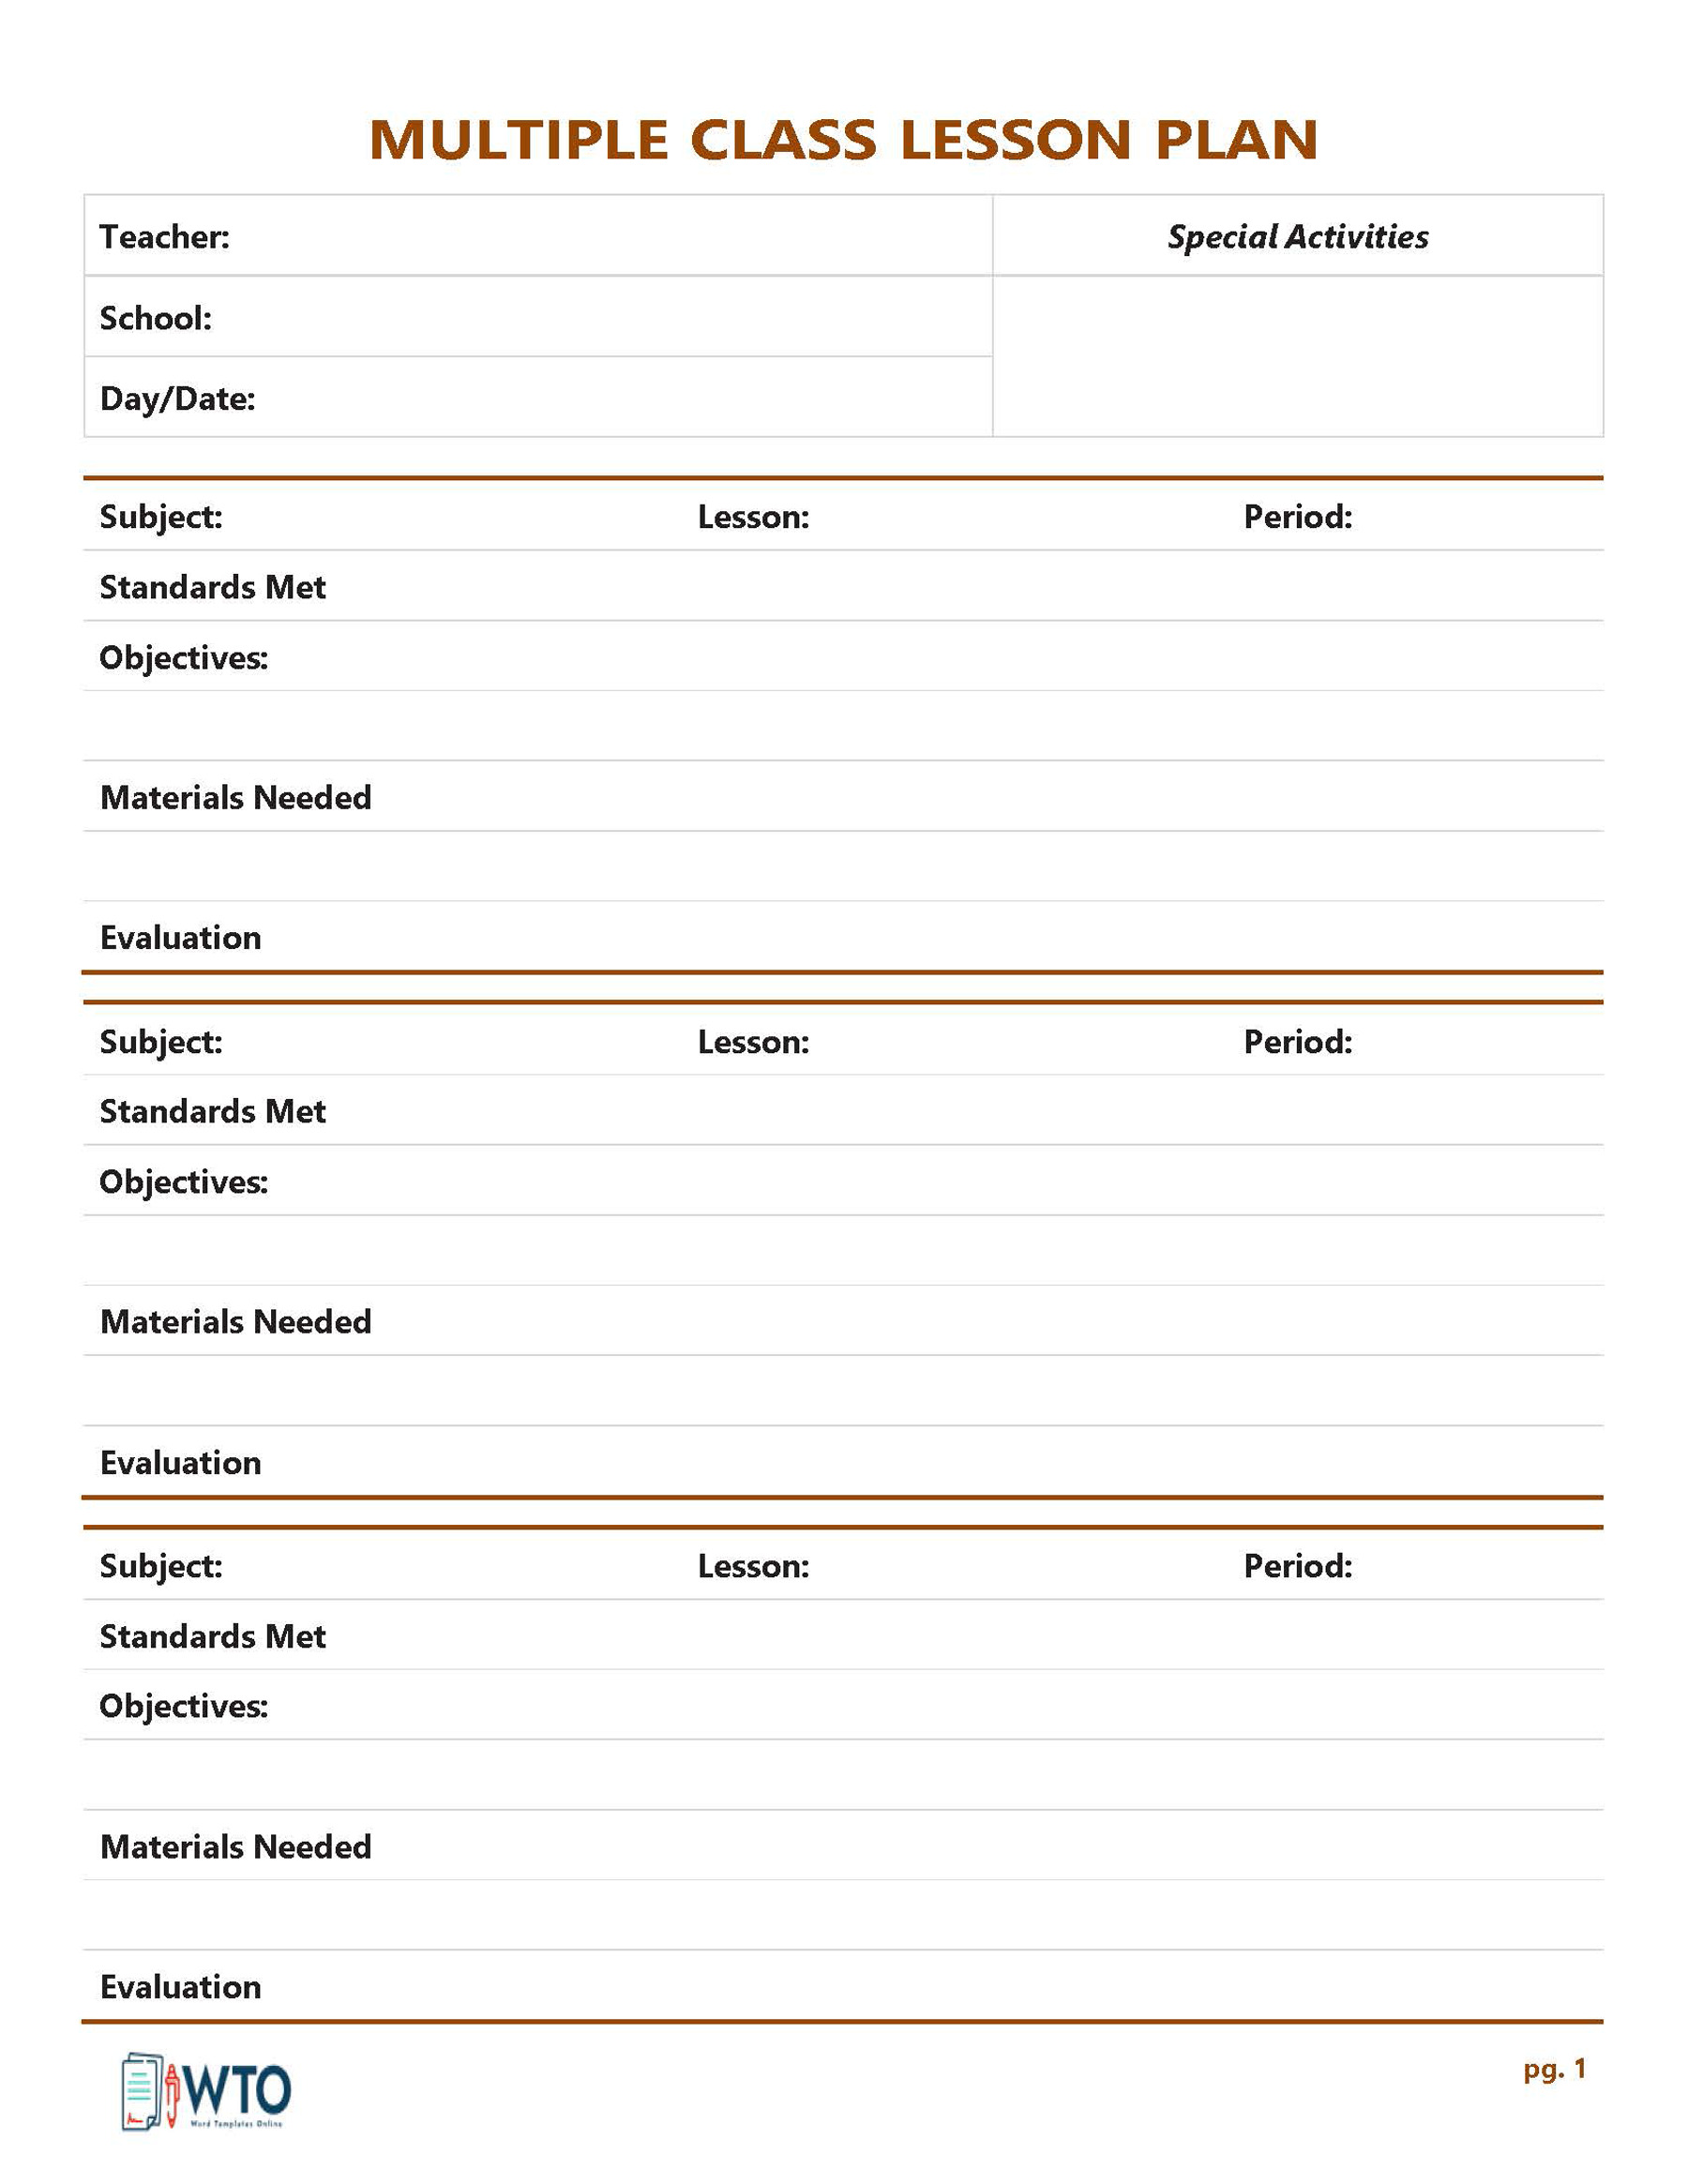
Content area
A content area lesson plan is best for teachers teaching several daily subjects. It allows you to create multiple plans, such as a plan for HHHistory, English, Math, Science, and so on. Elementary school teachers use this type of template because one teacher teaches all subjects in the same classroom. It allows them to outline each subject that they will teach their class.
Grade level
A grade-level lesson plan is typically used for grades 6 to 12, where teachers teach the same subject for different grades. The lesson plan is set out differently for each grade level. For example, one teacher may teach 7th-grade Math during the first part of the day and then teach 8th-grade Math during the second part of the day. Each lesson plan is created specifically for those grade levels and contains different content.
Essentials of a Lesson Plan
As mentioned earlier, each lesson plan layout will differ from one teacher to the next, depending on what they are teaching. However, there are a few key components that every lesson plan should have:
Learning outcomes
The learning outcome describes what you want the students to have learned as a result of what you will teach them.
Learning plan
The learning plan is the structure you will use, such as activity time frames, what role the students will play, what role the teacher will play, and the method you will use to teach the students, etc.
Assessment
This will outline two things: before the class begins, you must determine what you will use as a baseline to assess the student’s understanding and knowledge of the covered topic. Then, after the lesson has concluded, you will need to determine how to assess the students to determine if the learning objectives are achieved.
Required materials
This section outlines what will be needed through each area and activity of the planned lesson, such as specific textbooks, internet access and computers to do research, a projector to teach part of the class, charts, newspaper articles, and worksheets for the students.
Evaluation
This is where you will evaluate how well the lesson plan worked for the students. You should determine whether the content or learning session was too easy or hard, whether the students were motivated, and whether they reached the goals set out for the lesson. A lesson plan helps you, as a teacher, to evaluate how well the lesson plan worked. It can show you the weak and strong areas of your lesson plan so that you can make adjustments for future lesson plans.
9 Steps to Create a Lesson Plan
Each school will have different requirements regarding what they want their teachers to cover in their lessons. You can also have different requirements for charter and private schools with different curricula; for example, a catholic school will include religious studies. Therefore, before you create your lesson plan, it is a good practice to have a word with your school administrators to know what needs to be covered.
Then, you can follow the following steps to create an effective lesson plan:
Step 1: Mention the grade level and subject
Your first step is to include the subject you will teach and the grade level the material is for. It gives clarity to anyone who wants to review your lesson plan, such as an administrator, to see what you will teach and to whom.
Step 2: Specify the type of lesson
The next step is to explain what lesson you will teach. This means specifying whether you are teaching an entire unit or teaching the parts of the lesson plan during one class period each week.
Step 3: Write the duration of the lesson plan
In this step, you will be laying out how much time it will take to cover the entire lesson. Lessons can be taught during an entire class period or over a longer time frame, such as one class per week. It would be best to mention how long each teaching session would be.
Step 4: Mention the unit/topic
This element will explain the focus or subject of the lesson plan. This can be for the entire unit or can break down the unit into sub-sections; for example, if you are teaching a unit of Chemistry but will be teaching different aspects of Chemistry each week, your lesson plan would include the topic “Chemistry” and then weekly subtopics, such as “Chemistry – the periodic table”, “Chemistry – breakthroughs in history”, and so on.
Step 5: Compile the learning objectives and outcomes
This element is an essential part of a lesson plan. It outlines the goal/objective/outcome you expect your students to accomplish after the lesson. Your description should be written in a way that is easy for your students to understand and should be reviewed at the start of each class. One way to develop learning outcomes is using “Bloom’s Taxonomy”, which is based on three overlapping categories.
They are ordered by difficulty in 3 domains:
- Cognitive/Knowledge
- Affective/attitude
- Psychomotor/skills
The most accessible form of learning is the student’s recall, and the more complex form is the student’s ability to evaluate. Ask yourself these questions:
- What should your students expect to learn from the lesson you are teaching?
- What do you want your students to do after class?
- In what way will your students be able to apply what they have learned in the outside world?
Tip: The objective should be based on SMART criteria: Specific, Measurable, Attainable, Relevant, and Time-based.
Step 6: Know your learners and select a teaching method
Always consider your students when creating a lesson plan. You need to know their grade level, learning ability, and what teaching method works best for them. For example, how you teach a class of 6th-grade students will differ from how you teach a class of 12th-grade students. In addition, you may have some classes for children with learning disabilities that need to be taught differently than a class of top-level students.
Here are some things to consider:
- In most classes, you will have a mix of students, some of whom work better independently and some who work better in a group. This can help you to plan out activities that will benefit both.
- Some students may have higher skills and knowledge about the topic you are teaching, whereas others won’t be familiar with the topic at all. Knowing this will help you when pairing students in groups to work together.
- The needs of each student are unique, and this is something that you need to consider when determining how much material you will include and how long each part will take.
Step 7: Plan your resources and materials
In this step, you will outline any materials needed or provided for the class and any resources students can use to help them through the lesson plan. An example would be a list of resources students can use to gather information or textbooks that will be supplied for that specific lesson. The purpose of this step is to make sure that your students are well-prepared for the lesson.
Step 8: Write the directions of what and how you will present
This step will take the most time of all the sections in a lesson plan. It should clearly explain what tasks you will be doing and what information you will teach. Your directions can be a minute-by-minute explanation or can be more generalized. An example would be explaining that you will spend the start of the lesson reading from a textbook, 20 minutes explaining the lesson, and then have a short quiz at the end of the class.
Step 9: Evaluate the lesson
An assessment is done after the class, and its primary goal is to determine how well your students have understood the material and topic of the lesson. This can be done as a question-and-answer session, a test, or a demonstration.
Tip: You must make sure that you leave enough time before the questions and answer session. You should plan at least 10 minutes at the end of each lesson to discuss what was learned. You can then ask questions to see how well the material was understood. It also gives the students a chance to ask their questions. Another option is to create small groups and assign each group to discuss one aspect of the lesson.
Lesson Plan Free Templates
Having a lesson plan can make the lesson-planning process much more manageable. For this purpose, this website has provided free, downloadable, and customizable lesson plan templates. You can download these templates for your ease. These templates will ensure you do not spend too much time planning the lesson and do not forget to miss any essential information.
Attention-Required Points
You must be prepared for every eventuality when teaching a lesson and following your lesson plan. Here are some key points to help you:
Script out a lesson
Scripting out a lesson can be helpful if you are feeling nervous about teaching a lesson, especially for the first time. Making a list of questions will help you to stay in control of the direction that your discussions will go in. In addition, as a teacher gains confidence in their teaching methods, they will be able to spend less time scripting their lesson. This allows them to spend more time teaching the lessons.
Allow for wiggle room
While a lesson plan can help you keep on track with your teaching, you should also leave some wiggle room as you plan. First, determine if there are tasks that can be skipped if the lesson lacks time. Next, determine what parts of the plan cannot be skipped, such as tasks that give your students the most information about the topic. Finally, you should also plan extra activities if the lesson ends earlier.
Over-plan, the class
When it comes to teaching, having more tasks to do is better than sitting idle. A lot will depend on how well your students understand the lesson. If you have planned 25 minutes for one part of the lesson, try cutting this down to 20 minutes. If your students complete the lesson early, it will give you time to discuss what has been learned.
Make it for a substitute teacher
A lesson plan should be created so that a substitute teacher understands. This will help them pick up where you have left, and it should be easy to understand the lesson’s objectives. If you are a teacher who likes to plan your lessons far in advance, having a simple lesson plan is a great way to refresh your memory when it comes time to teach this lesson.
Form a backup plan
There will always be days when your class gets through a lesson quickly and days when it takes longer due to a lack of motivation. Test dates may need to be rescheduled, and planned activities can sometimes fall through. So, it would be best to have a backup plan for these situations. You should also plan some side lessons as an alternative if things do not go according to the plan. For example, if you planned a short film to watch as part of the lesson, and the projector is not working that day, you should have an alternative that will keep the flow of the lesson plan going.
Wrapping Up
As a teacher, you want your students to get the most out of the lessons that you are teaching. Creating effective lesson plans, having backup plans, and being flexible can help things run smoothly. In addition, as you advance in your teaching career, you will find new and inventive ways to motivate your students. This will help you best deliver the information you are teaching your students.
About This Article