Screenplays are an essential part of visual and audio production. They sell the scriptwriter’s vision and help in facilitating pre-production, production, and post-production. It is therefore critical that you understand the appropriate format to use when writing a script. You should also understand how a script writing template can help in enabling a smooth and effortless writing process.
A Screenplay or Script is a written document that outlines what is seen in a motion picture production which mainly includes the actions, dialogue, and characters that appear on the screen.
It is also used for shows, television, or other moving media. It provides both the visual and narrative aspects of a story. It is a blueprint for the director, cast, and the rest of the production team. A screenplay may also include transitions and stage direction to ensure that your vision is vividly expressed.
Screenplay Templates
Basic Information on a Script
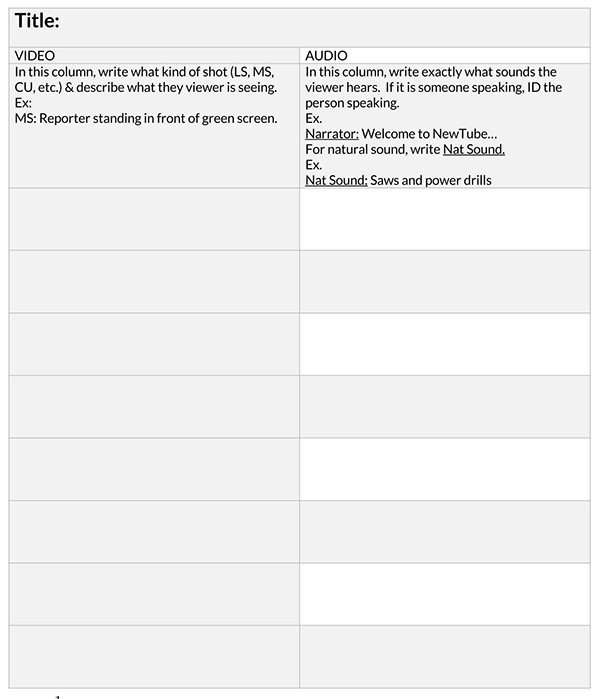
The information contained in a script writing template for a movie or a play will enable you to express your visual work of art creatively. It will also ensure that information is structured clearly.
The following elements should be present in a screenplay template:
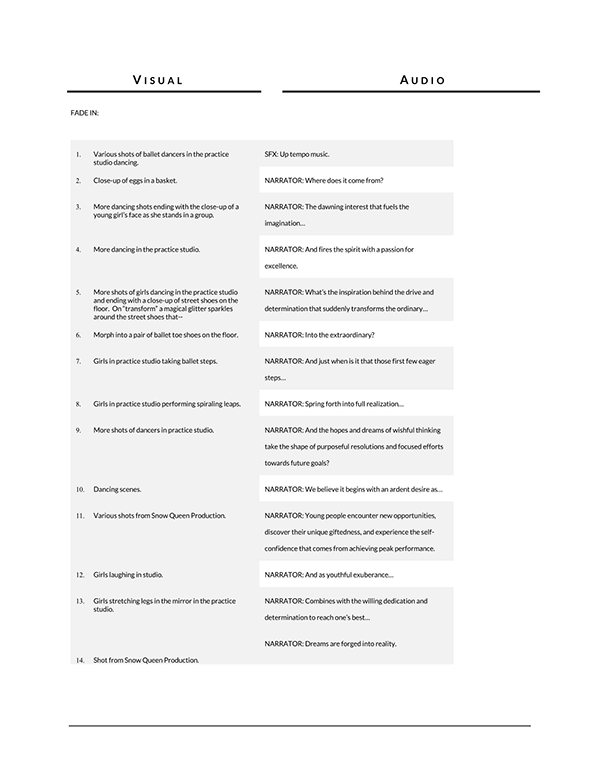
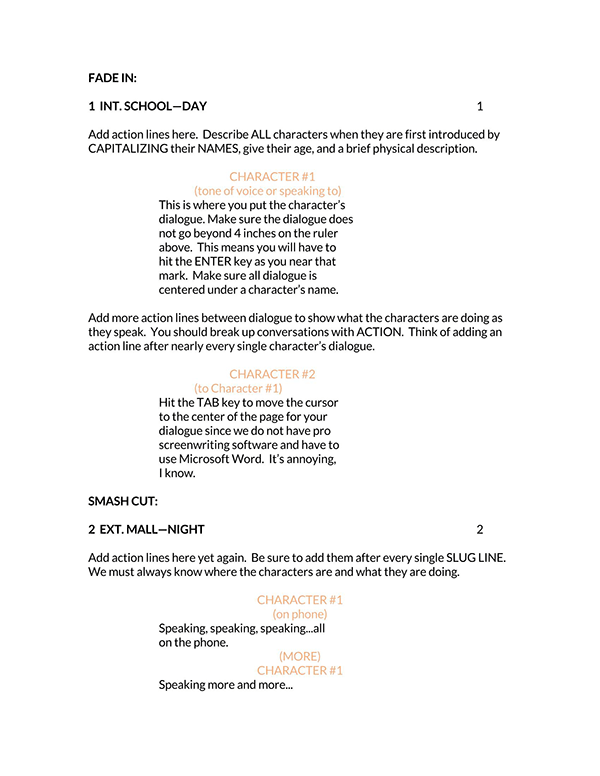
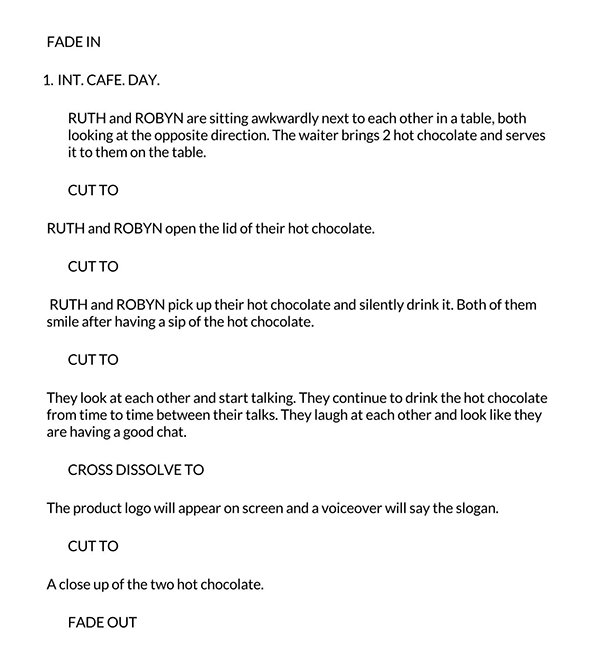
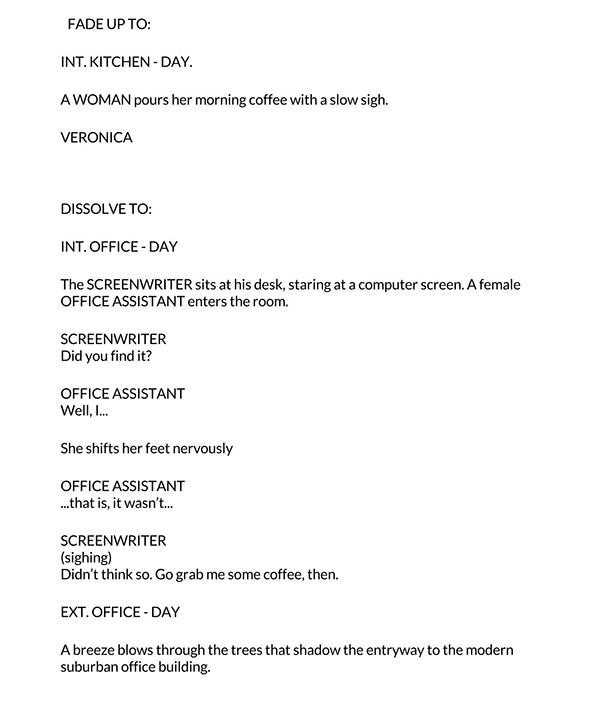
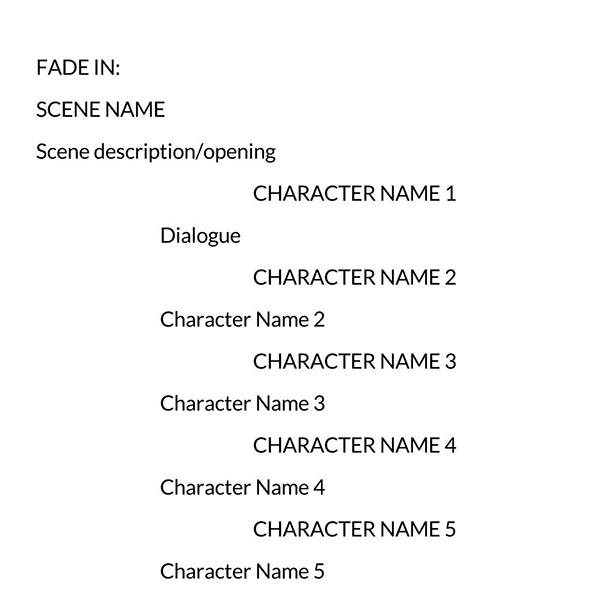
Fade in
A screenplay template should begin with the word fade-in. It can either be indicated on the left or right side of the page in a capitalized format. It helps indicate the start of the screenplay.
EXAMPLE
FADE IN:
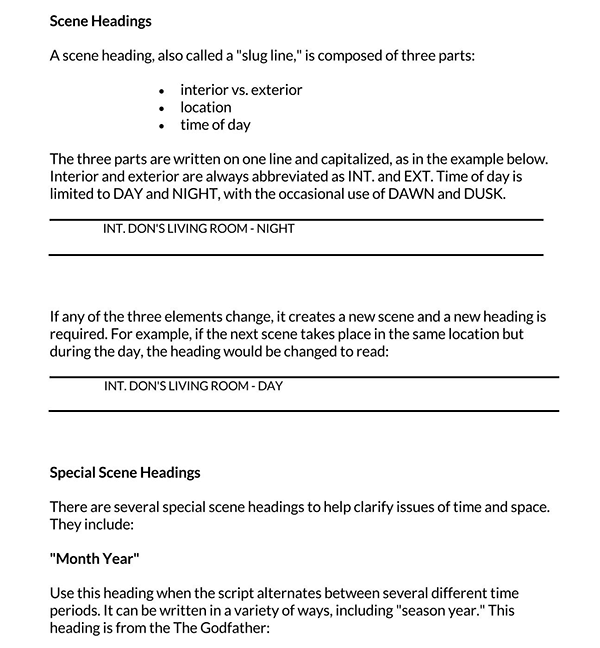
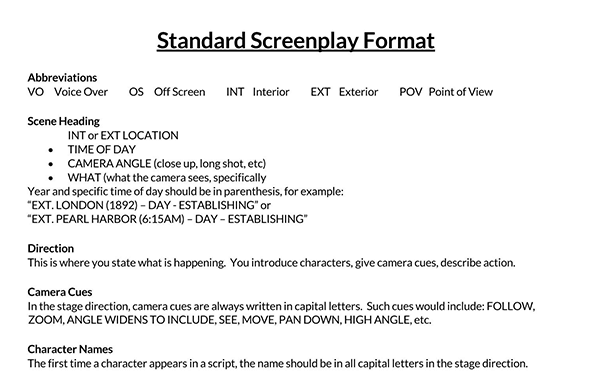
Scene heading
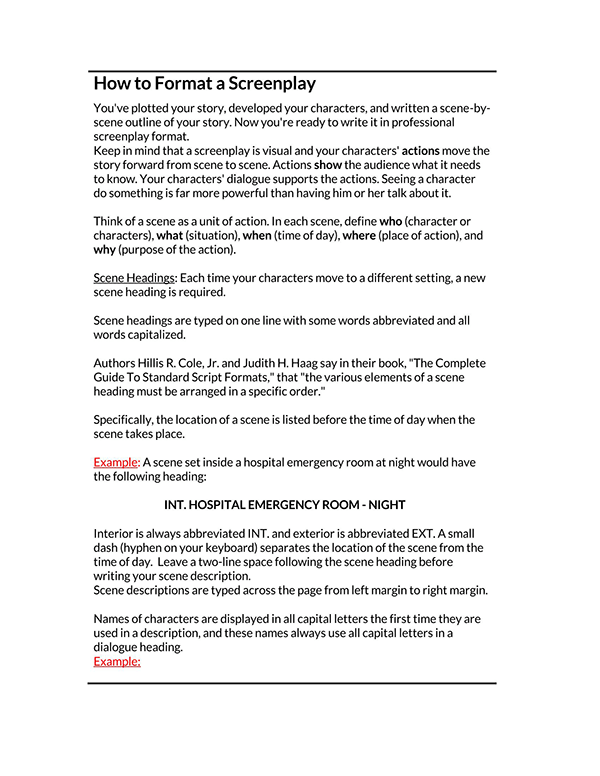
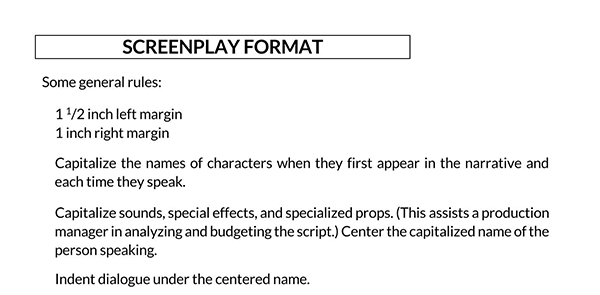
The screen heading is also referred to as the slug line. It is a short description of the scene’s location and the time of day when it is taking place, written in all CAPS. The scene heading’s indentation should be 0.0” on the left, 0.0” on the right, and a width of 6.0.”
EXAMPLE
INT.WNTER’S CLUB-NIGHT
Or
EXT. WINTER CLUB- NIGHT
Scene number
The scene number is a production-based element meant for shouting the script. Scene numbers help directors schedule shoot days, casting needs, editing, and other pre-production, production, and post-production elements. The scene number should be indicated on the left side of the page.
Action
An action line is also known as direction, black stuff, visual exposition, scene direction, or description. It should only contain what can be seen or heard in the scene. It creates an atmosphere by establishing a tone, pace, and visual and visceral experience of the screenplay. The action line’s indent should be 0.0” in the left, 0.0” in the right, and width of 6.0”.
EXAMPLE
He slowly walks to the packed dance floor, his eyes fixated on her.
Character
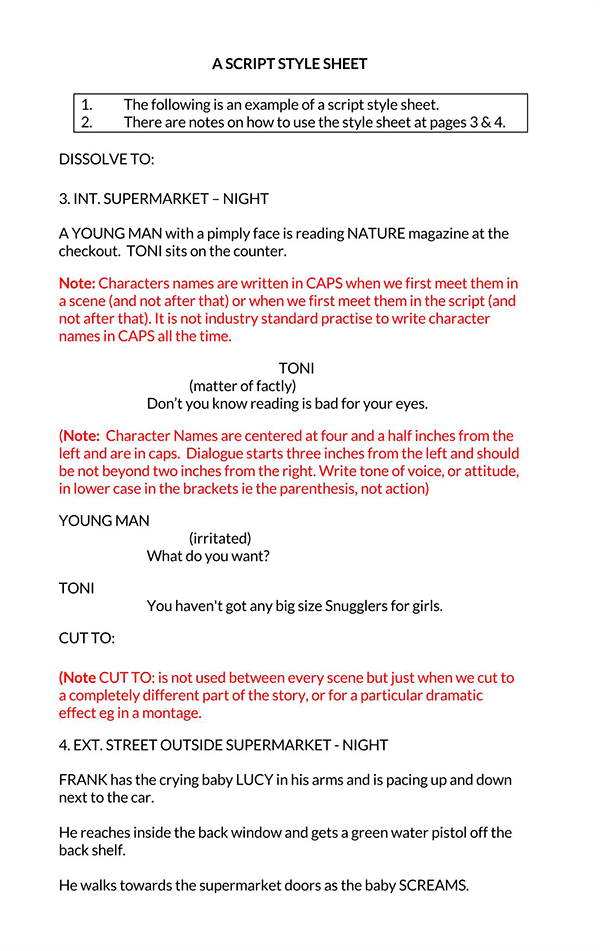
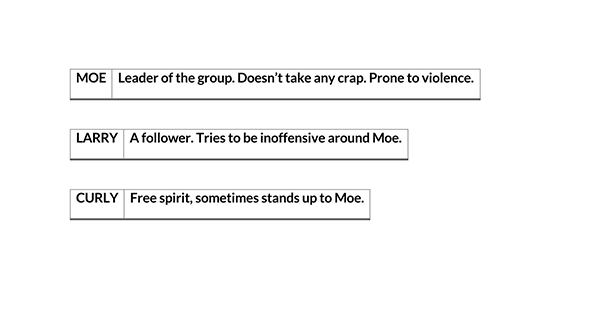
The character is the individual delivering dialogue or contributing to the scene or story. A character’s name should be capitalized when introduced in the action line, followed by the dialogue in the screenplay template. Minor characters can be listed without names such as ‘TAILOR,’ ‘BUS DRIVER,” LUNCH LADY.’ The character name should have an indentation of 2.0” on the left, 0.0” on the right, and a width of 4.0”
EXAMPLE
ADAM LEE, a 45-year-old bartender at the club, signals the Boss’s arrival to the rest of the crew.
Transition
Transitions indicate changes from one setting to a different setting or the movement from the present time frame to a different time frame. They are often indicated in a shooting script for use in post-production to combine different shots and scenes. Transitions should be capitalized. The screenplay template may contain transitions such as CUT TO, QUICK CUT, FADE TO, DISSOLVE TO, or SMASH CUT. It should have a left indentation of 4.0”, a right indent of 0.0”, and a width of 2.0”.
EXAMPLE
CUT TO:
Dialogue
Dialogue lines are used to express a character’s point of view or to help understand interpersonal dynamics among characters. The character’s speech should have an indentation of 1.0” on the left, 1.5” on the right, and a width of 3.5”.
EXAMPLE
ADAM LEE:
The Boss doesn’t want to be disturbed.
MAX:
Well, that’s not my problem. Tell him that if he doesn’t come out here, he will be charged with obstruction of justice.
Extension
Extensions are abbreviations placed on the right side of the character’s name. They are used to indicate how a line is heard off-screen. When the character is in the room but is not seen by the camera, you can indicate the character’s voice as ‘O.S’, and when only the character’s voice can be heard, the word VoiceOver is used and abbreviated as V.O,
EXAMPLE
ADAM LEE (V.O.)
The moment he walked in, I knew it was over.
Or
MAX (O.S.)
I don’t know, Emily!
Intercut
Intercut is used when the screenplay indicates two locations playing out alternatively in a scene without using a slug line. It is often used in a phone conversation where scenes are cut down between different locations. It saves space and time in writing the template for the script.
EXAMPLE
INT. HOUSE-NIGHT
Alice angrily pulls out her phone and dials
ALICE:
I swear, Tom, you better not be where I think you are!
INT. CASINO- NIGHT
Tim sees the number on his phone and quickly walks to a quiet corner.
TIM:
Hi, love, what’s up!
INTERCUT ALICE/TIM
ALICE:
Where are you?
TIM:
Am at work. Sorry, I forgot to text you earlier. Something came up.
ALICE:
Really Tim! I hear the music in the background
Parenthetical
A screenplay template should contain a parenthetical description. A parenthetical is a short description that appears after a character’s name. It notes the character’s attitude or action while delivering a line of dialogue. For example, it can be used when you want the reader to understand the character’s emotions. A parenthetical should have an indentation of 1.5” on the left, 2.0” on the right, and a width of 2.5”.
EXAMPLE
ALEX:
(looks back with a slight grin)
Don’t worry. I won’t let anything happen to her.
Subheader
A subheader is used when you want to avoid repeating the same information and increase the pace of action sequences, such as quick cuts between two locations. When used appropriately, you can distinguish the action without having to create a new scene heading. It should have an indentation of 0.0” on the left, 0.0” on the right, and a width of 6.0”.
EXAMPLE
INT. JACK’S HOUSE-EMMA’S BEDROOM-DAY
Emma sizes herself up in front of the mirror and applies her red lipstick.
INTER. JACK’S HOUSE – BEDROOM-MOMENTS LATER
Emmer emerges from the closet and grabs her Gucci purse. She checks in to make sure she has all her things in order. Then, she hesitantly walks out of the room.
INT. BEDROOM- MOMENTS LATER
Emma dashes back into the room where a necklace lay on her bedside table. She puts it on, smiles and struts out of the room.
Shot
The screenplay template may also contain a short description to establish that there has been a change in the focal point of the script. Shot descriptions are often used during production by directors. You can use shot descriptions like extreme close-up, pan to, angle to, (Character name) POV.
EXAMPLE
ADAM’S POV
INT. HALL-Alice seems to glide across the room. Each movement is slow, gentle, and elegant.
More and continueds
More and continueds are used when the same character speaks, but the dialogue stretches between two pages. Continueds are also used when writing a long dialogue where the character continues to speak within a page. The word ‘CONT’D is indicated after the character’s name, while ‘MORE’ is placed at the end of a page to indicate that the dialogue stretches to the next page.
EXAMPLE
MARK:
I’m always the one carrying the weight of this relationship. All you do is tell me what I am not. I just don’t understand what I am doing wrong. Gretta, say something…
MORE
___________________________________________
MARK (CONT’D)
Should I leave, would that make you happy. You know that I am done with you and whatever the heck this is. Am done! That’s it!
Page number
A page number is indicated at the top right corner of the page of the screenplay template. When indicating a page number, you should flush to the right margin and indicate the number a half-inch from the top of the page.
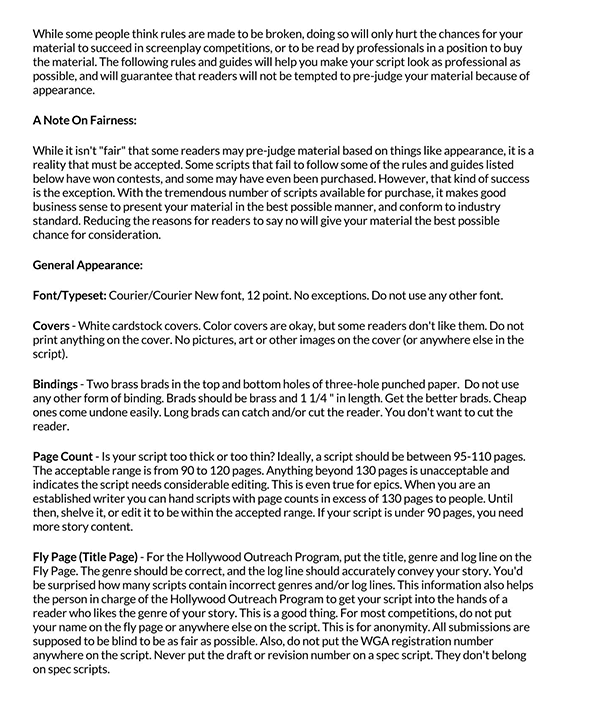
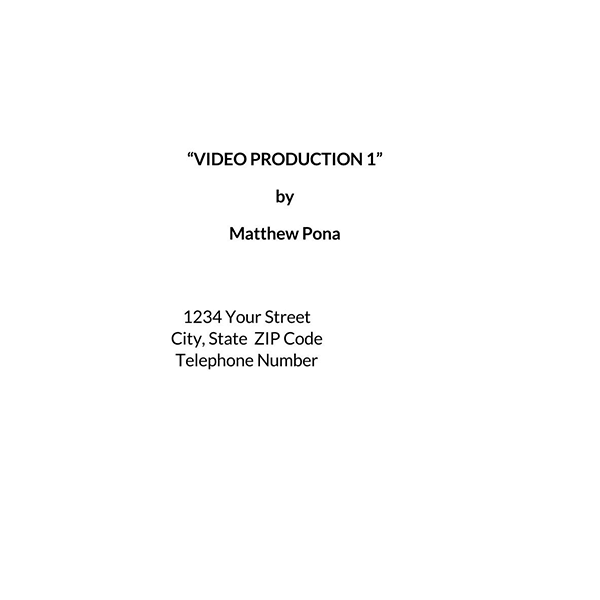
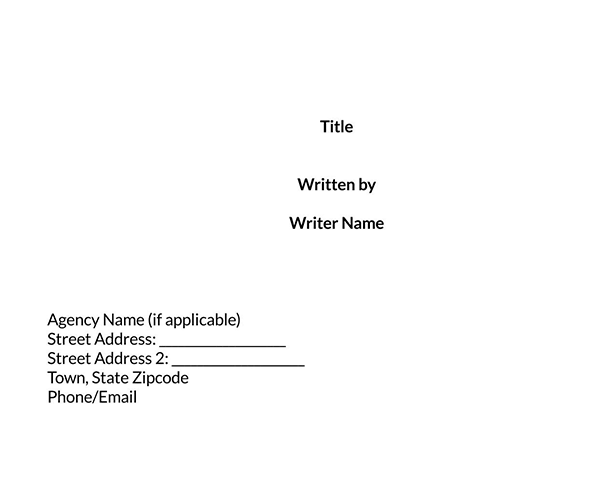
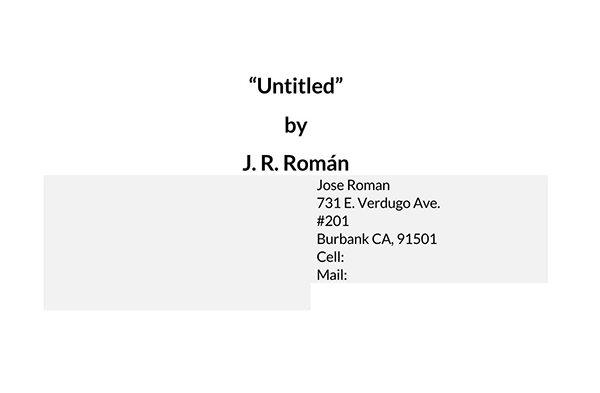
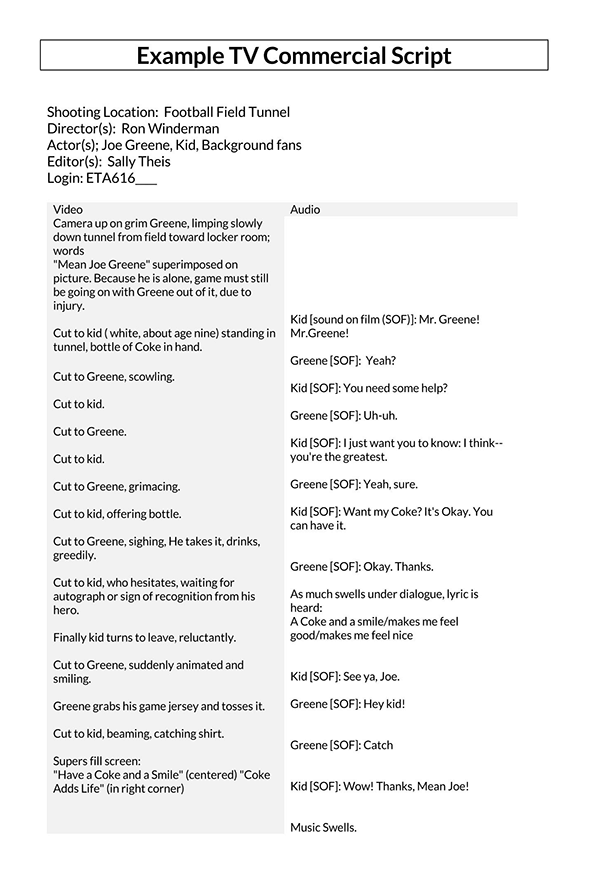
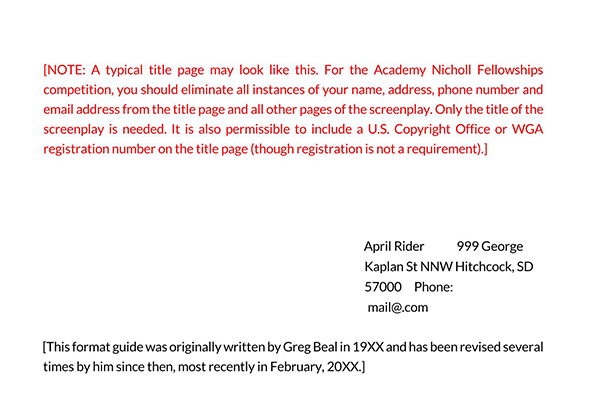
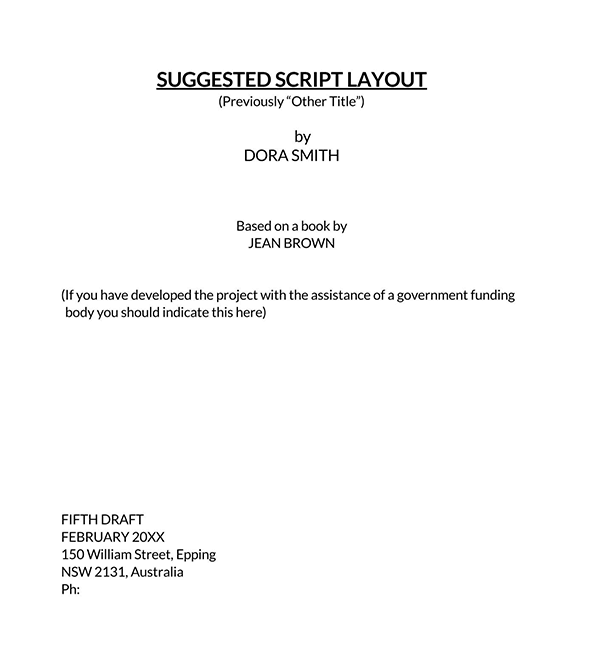
Screenplay Title Page Format
A screenplay template should contain a title page to help set the stage for what a reader is likely to find in the script. The title page should have a standard Courier 12-point format.
It should contain the following information:
The script title
The script title identifies the name of the screenplay. It can affect the reader’s reaction and plays a key role in marketing the screenplay.
Your name
Your name and the name of any individual who contributed to the screenplay should appear below the script title. The names can be indicated under the terms ‘Written by‘ and ‘Story by.’
Drafting date
The drafting date helps keep track of the drafts you have sent to producers, as rewriting is standard practice.
Contact information
Your email and phone number will enable producers to get in touch with you. You may also indicate the contact details of your representative.
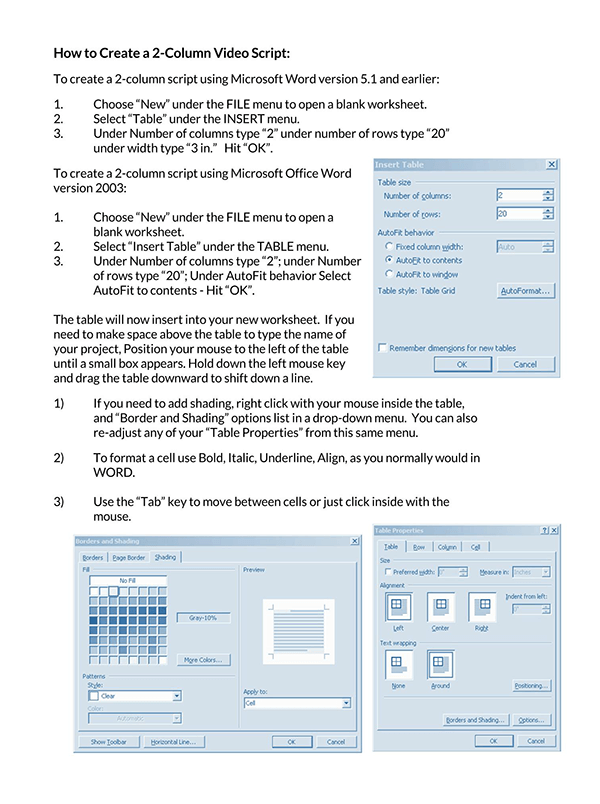
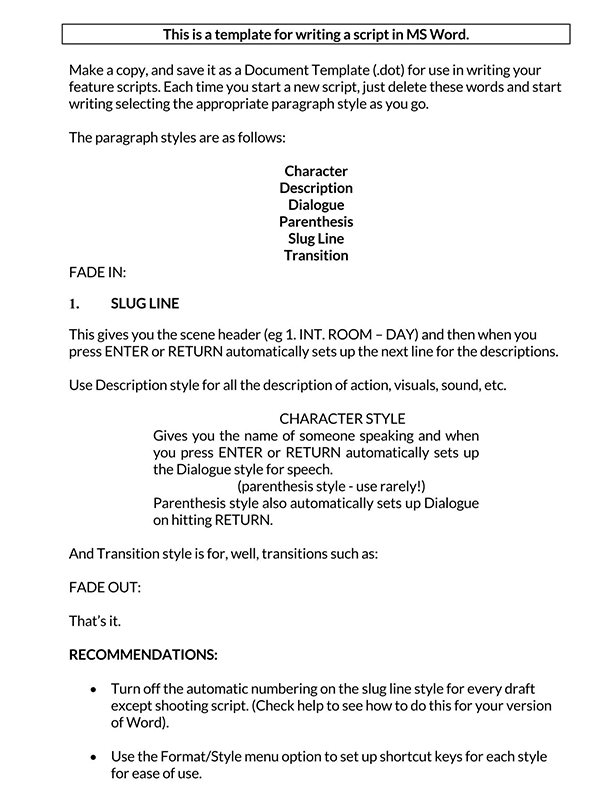
How to Design a Screenplay Template Using M.S. Word?
You can opt to design your own screenwriting template using M.S. Word if you find the software route too expensive. The following information explains how you can create a screenplay template using M.S. Word:
Open a blank document
You should begin by running M.S. Word. Once open, you should move the cursor to the left corner of the screen, go to the menu bar and select ‘File.’ Click on it to open a blank document.
Search for a screenplay template
Next, move the cursor to the search bar, click on it, and type ‘screenplay’ to run a search. You should double-click on the template option once it appears. You will be presented with two options from which one should be selected and downloaded. Or you can also use our pre-made templates.
Make adjustments as desired
You should then make style adjustments as desired. You should ensure that the general guidelines, vocabulary, and standard features are considered. Adjustments on margins line spacing, font type, and style can be made.
Select a line of text
You should select a line of text for which the desired changes will be made. The text can either be a character name, a line of dialogue, or an action line. It can be selected by left-clicking on the mouse and dragging the cursor to highlight the text.
Open the style and formatting pane
For the desired formatting and styling choice to be implemented, you should move the cursor to the menu bar while the text is still highlighted. Move to the ‘Format’ option on the menu bar and click on it. Several options will appear from the drop-down menu, and you should click on the ‘Styles and Formatting options.’
Choose text with similar formatting
To initiate formatting, you should ensure that the selected text is still highlighted. Next, you should right-click on the highlighted text to open the option on the drop menu. Finally, left-click on ‘Select text with a similar formatting’ and click on it.
Choose font style
You should then select the font style for the chosen text. Font style can be applied by selecting options from the right pane of the ‘Select with similar formatting’ option, and it will highlight all text similar to the original highlighted text.
Create a new style
You can create a new style if unsatisfied with the options provided. To create a new style, you should click on the ‘New Style’ option at the bottom of the pane. A name can then be assigned to the style. You should also align the text to the left or right and select a font.
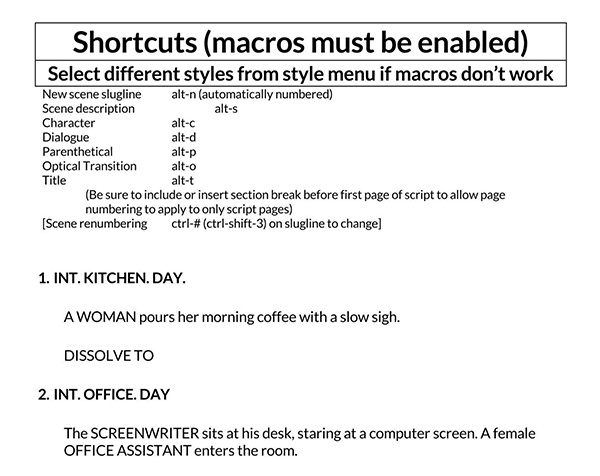
How to Create a Macro by Using M.S. Word?
A macro can be defined as a series of automated commands and instructions that imitate mouse or keyboard actions. They help speed up the process of writing the screenplay.
A macro is created in the following cases:
Setting up scene
To create a macro for setting up a scene, consider why it is essential. Make preparations for the macro to be recorded by setting up the left margin to 1.5” and the right margin to 1”. Set font type to Courier new and font size to 12.
- When creating the macro, click view, select macro, and choose the ‘Record new Macro’ option.
- You should then assign the name ‘scene heading.’
- Select the ‘All documents’ option from the drop-down menu of the ‘Store macro in.’
- Assign a keyboard icon from the ‘assign macro to option.’
- Next, move to the clickable box ‘Press New Shortcut Key,’ click assign or press enter, and click ‘Close.’
- Later, go to the tape recorder icon next to the mouse and double-click on it.
- Go to the page layout and change the indentation back to 0 “.
- Next, open the Home tab by clicking the Font section, select the ‘Effects’ section, click All caps, and press OK.
- Finish the macro by going to the view tab, click Macros, select stop recording. The selected keyboard option will automatically skip two lines and capitalize text when you want to enter a scene heading.
Description
When creating a macro for description, start by considering why it is being created.
- Open the layout tab and set the margins.
- Set an indentation of 1” before and 1.5 “after the text. You should then click on view, select macro, and choose the record macro option.
- Type the name of the macro in the dialogue box.
- Assign the name ‘Description’ to the macro.
- Next, go to the ‘Store macro in’ below the macro name and select ‘All Documents’ from the drop-down options.
- Click on the keyboard option, assign a button to it by going to the clickable box ‘Press new shortcut Key,’ click assign, press enter, and finally click close.
- Go to the tape recorder icon next to the mouse and press enter twice to skip two lines.
- Remember to ensure that the indentation on the page layout tab is 0”.
- Later you should click on the home tab, go to the Font section, open it, find the Effects section to deselect ALL CAPS, and click OK.
- Finally, you should go back to the view tab, click it, and stop recording for the selected key to be effective.
Dialogue
- Start by creating a macro for character names, and follow the same steps used in creating a description. However, after the indentation has been changed to 0, you should press the space bar 22 times, select All caps, name the macro ‘Character’ and assign a keyboard button.
- You should also remember to skip down two lines during recording.
- Next, open the layout tab and set a margin of 1” before the text and 1.5 after the text.
- You can then go to the View tab, select macro, record the macro, and type the macro name ‘Dialogue.’
- Follow up by selecting the option ‘All documents’ from the ‘Store Macro in’ drop-down menu.
- Find the tape recorder icon next to the mouse and press enter to enable the keyboard to skip a line.
- Next, an indentation of 0” should be selected from the page layout.
- You should then go to the home page, move to the Font section, open it, find the effects section, choose All caps, and click OK.
- Finally, you should click the View tab, go to macro, and stop recording. Once it stops recording, the assigned tab will be utilized to allow you to enter the dialogue.
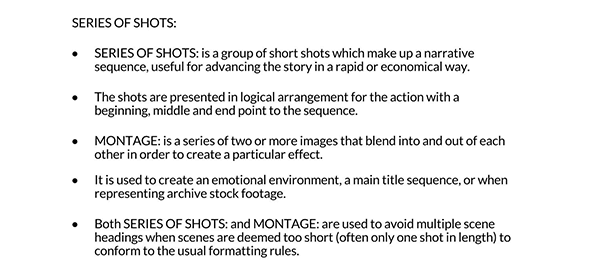
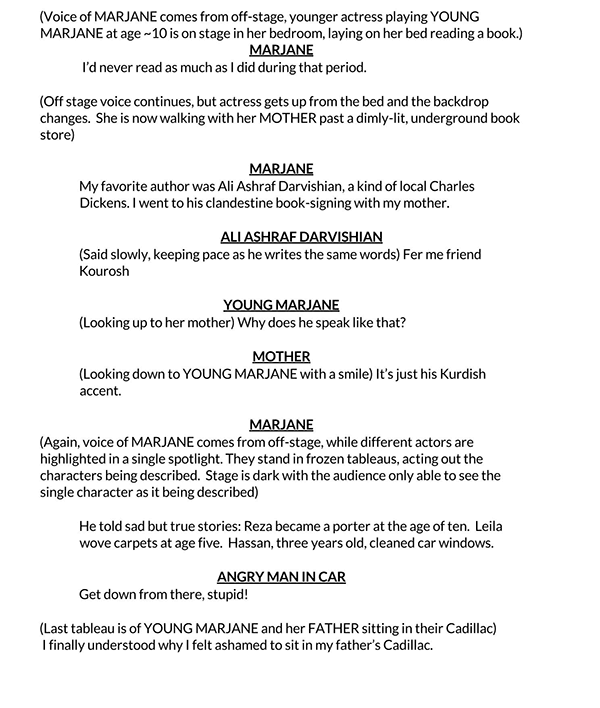
Format of a Montage in a Screenplay
Montages are sequences of short scenes or moments grouped to show the passage of time. They communicate a large part of the story in a short period while allowing the reader to experience the emotional and informational elements of the story.
The following are montage formatting choices that can be used in a screenplay:
Takes place in one location
When the montage takes place in one scene that is in progress, a list should be provided of the montage elements. The elements can be indicated as a separate action line or a bulleted list. Once complete, you should use a slug line to indicate the end of the montage, such as ‘BACK TO SCENE’ or ‘END OF MONTAGE.’
Takes place in many locations
When a montage takes place in several locations, you can use the slug line’ MONTAGE VARIOUS’ and then indicate the montage elements in a bullet or letter list. You may also opt to slug each montage element as its short scene. This method does not require you to indicate ‘MONTAGE’ on the short scene descriptions.
Format of a Phone Conversation in a Screenplay
Phones are a part of modern society, and hence, screenplays, when depicting today’s world, are bound to have phone conversations. Understanding how to format a phone conversation will enable you to quickly convey the exchange between characters.
One-sided phone conversation
Writing a one-sided conversation means that only one character can be heard. The character’s dialogue is as though a conversation were taking place with someone else.
For example, in the beginning, you can indicate “(character name) answers the phone,” and at the end of the scene, you can state “(character name) hangs up.”
Between two people
One character can be seen in a particular location; however, the other is unseen. Therefore, only the voice-over of the other character in the conversation can be heard. The other character’s voice-over should be indicated as ‘CHARACTER NAME (V.O).’
Between two people in two different locations
When writing a conversation between two people in different locations, you should start by establishing the location of the two characters on the phone. Then, the scene heading and the first line of dialogue should be outlined. For example, the dialogue line that indicates the beginning of the phone conversation should contain ‘INTERCUT-PHONE CONVERSATION’ or ‘INTERCUT with (character name) and (character name).’
Text Messages Format in a Screenplay
When indicating text in a screenplay, you can add parentheses after the character’s name, that is, ‘CHARACTER NAME (TEXT).’ Thus, the message will appear as the character’s dialogue. With phone calls, you can also opt to INTERCUT the two characters texting each other.
Do’s and Don’ts of Screenplay
You are likely to make several mistakes when writing your screenplay if you are not well informed of the dos and don’ts of the process. Understanding the do’s and don’ts of the scriptwriting process will ensure that you express yourself creatively.
Do’s
- You should ensure that no page number is indicated on both the title page and the first page of the screenplay.
- Each page should also have adequate lines to support the story. The line of each page should have 12 points to fit Hollywood standards.
- You should also ensure that the screenplay is free of grammatical and spelling errors. The spell-checking functions of the software you are using, including M.S. Word, can help identify the errors.
- Using script-writing devices also helps speed up the writing process by ensuring that specific details are not manually recorded.
- Finally, you should follow the studio or theater company’s formatting guidelines, as there is no limit to a screenplay’s formatting rules.
Don’ts
- All settings that you want the macro to achieve should be revered or turned off before recording.
- The auto-correct function should also be turned off to ensure that it does not slow down the process of writing.
- You should avoid providing vague action lines and unnecessary parentheticals as they can affect the quality of the screenplay.
Conclusion
A screenplay template helps in facilitating the creation of your script. You should understand when and where to place basic information such as action lines, dialogue, character names, and scene heading, among other elements. The studio or theater company should be consulted when making the decision on an appropriate format for the script. You should also be aware of the appropriate format to use when writing a montage and phone conversation to ensure that the screenplay effectively communicates each scene.
About This Article