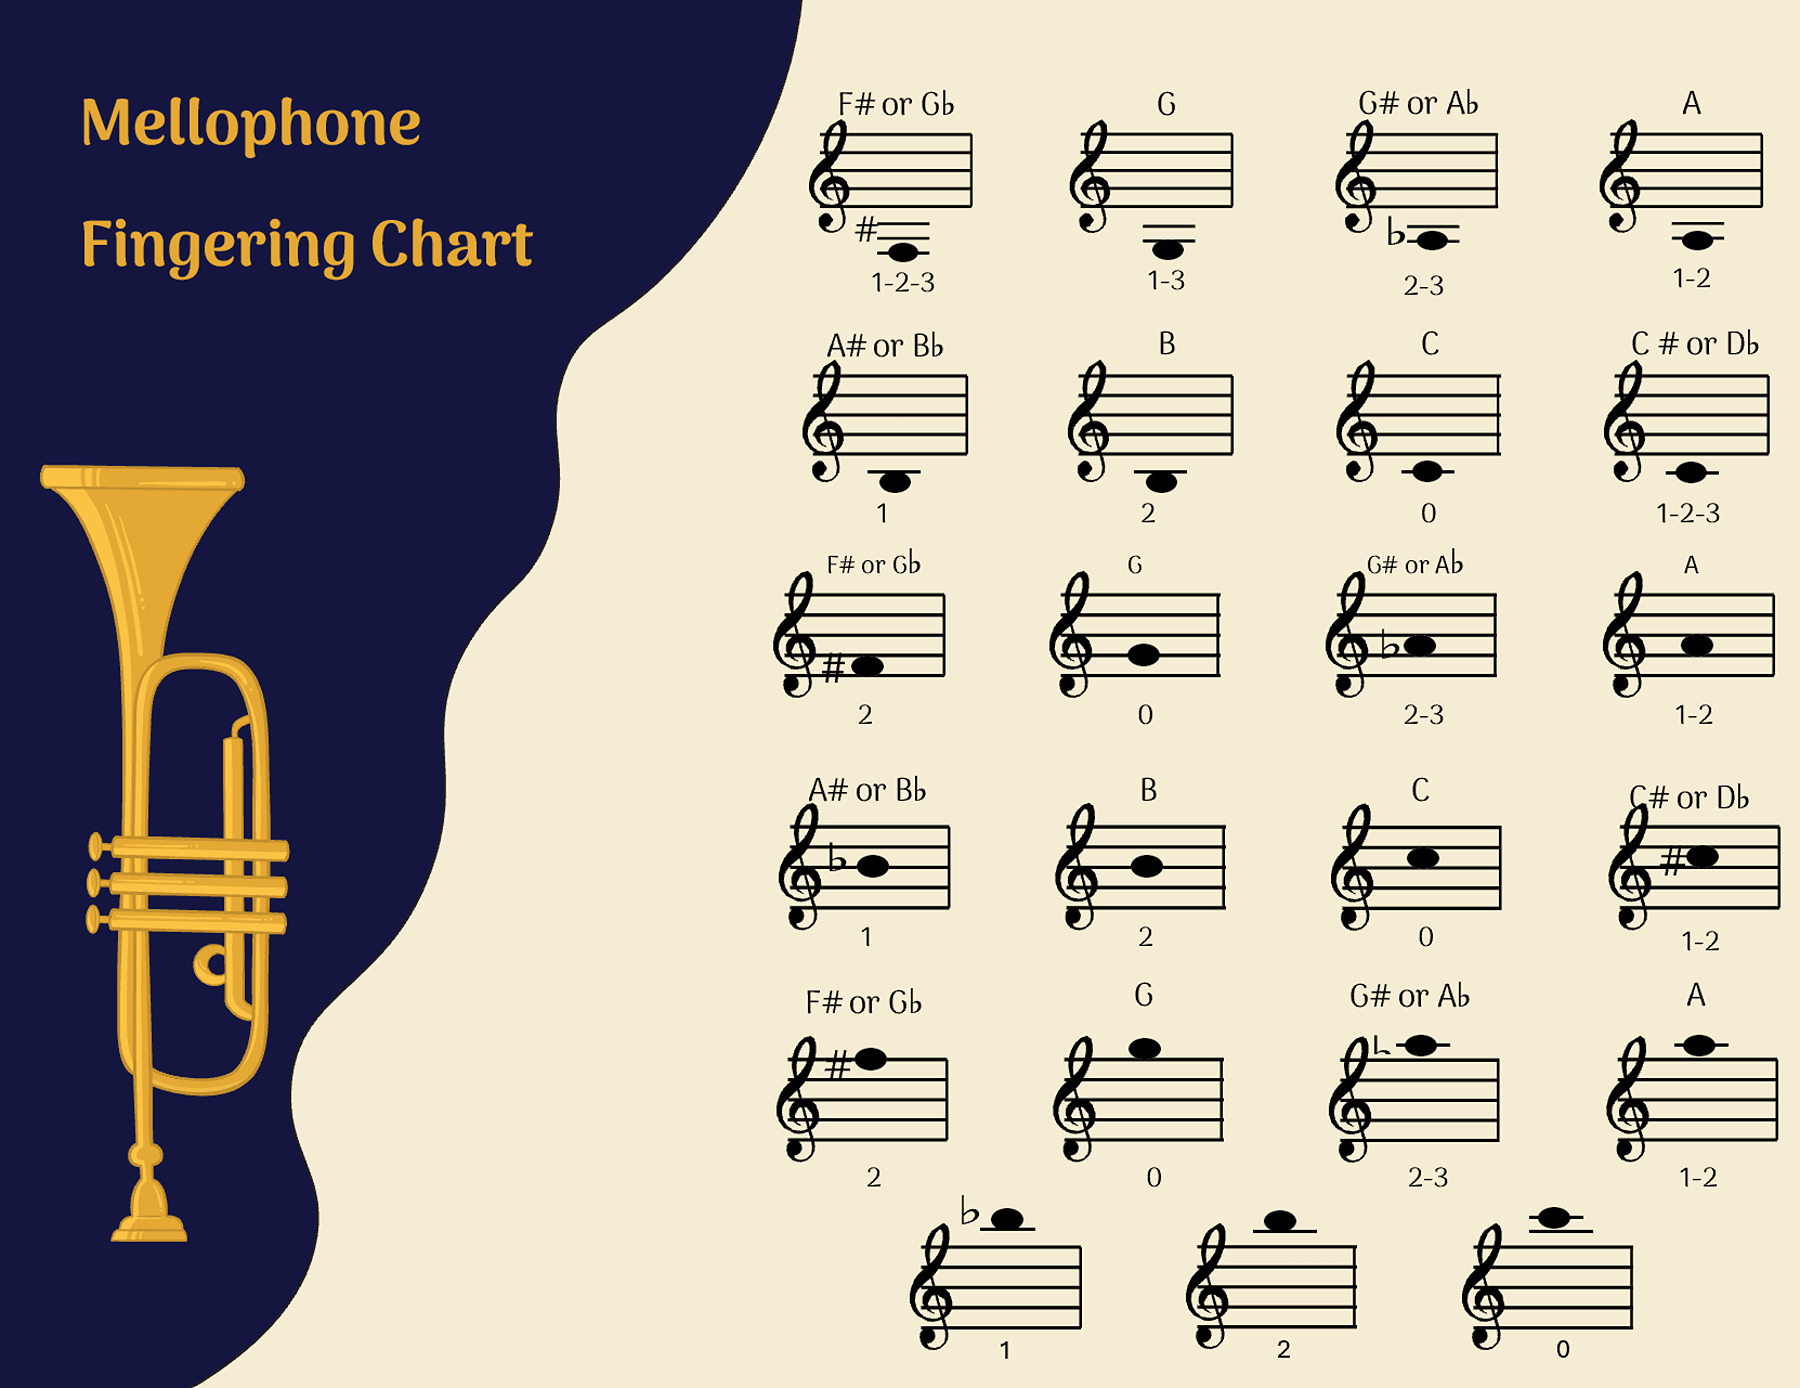
A mellophone fingering chart connects written notes with valve combinations. Before using an entry, check that the chart fits your instrument and that you have matched the note’s octave as well as its letter name.
This collection contains two static layouts: a numeric reference and a circle-based reference. Each offers a Word template in DOTX format, an ODT file and a linked Google Docs version. The guide below explains what to look for when choosing and reading them.
Check which instrument your part is for
Start by identifying the instrument you have been given. An F mellophone and a B-flat marching horn can look similar from a distance, but you should not automatically use the same chart for both. Horn teacher Colin Dorman’s mellophone guide explains the distinction between these instruments and their fingering conventions.
Ask your teacher or band director to confirm the instrument and how the part is written. That is especially useful if you are moving from concert horn or trumpet to a marching instrument. A familiar valve pattern alone does not establish which sounding pitch the entry represents.
Compare the two chart layouts
Chart 01 uses a landscape arrangement with staff snippets, pitch labels and valve numbers. It has 23 displayed entries, so the note and its numeric combination can be read side by side. Look for the actual note you need rather than assuming that every note in your part has an entry.
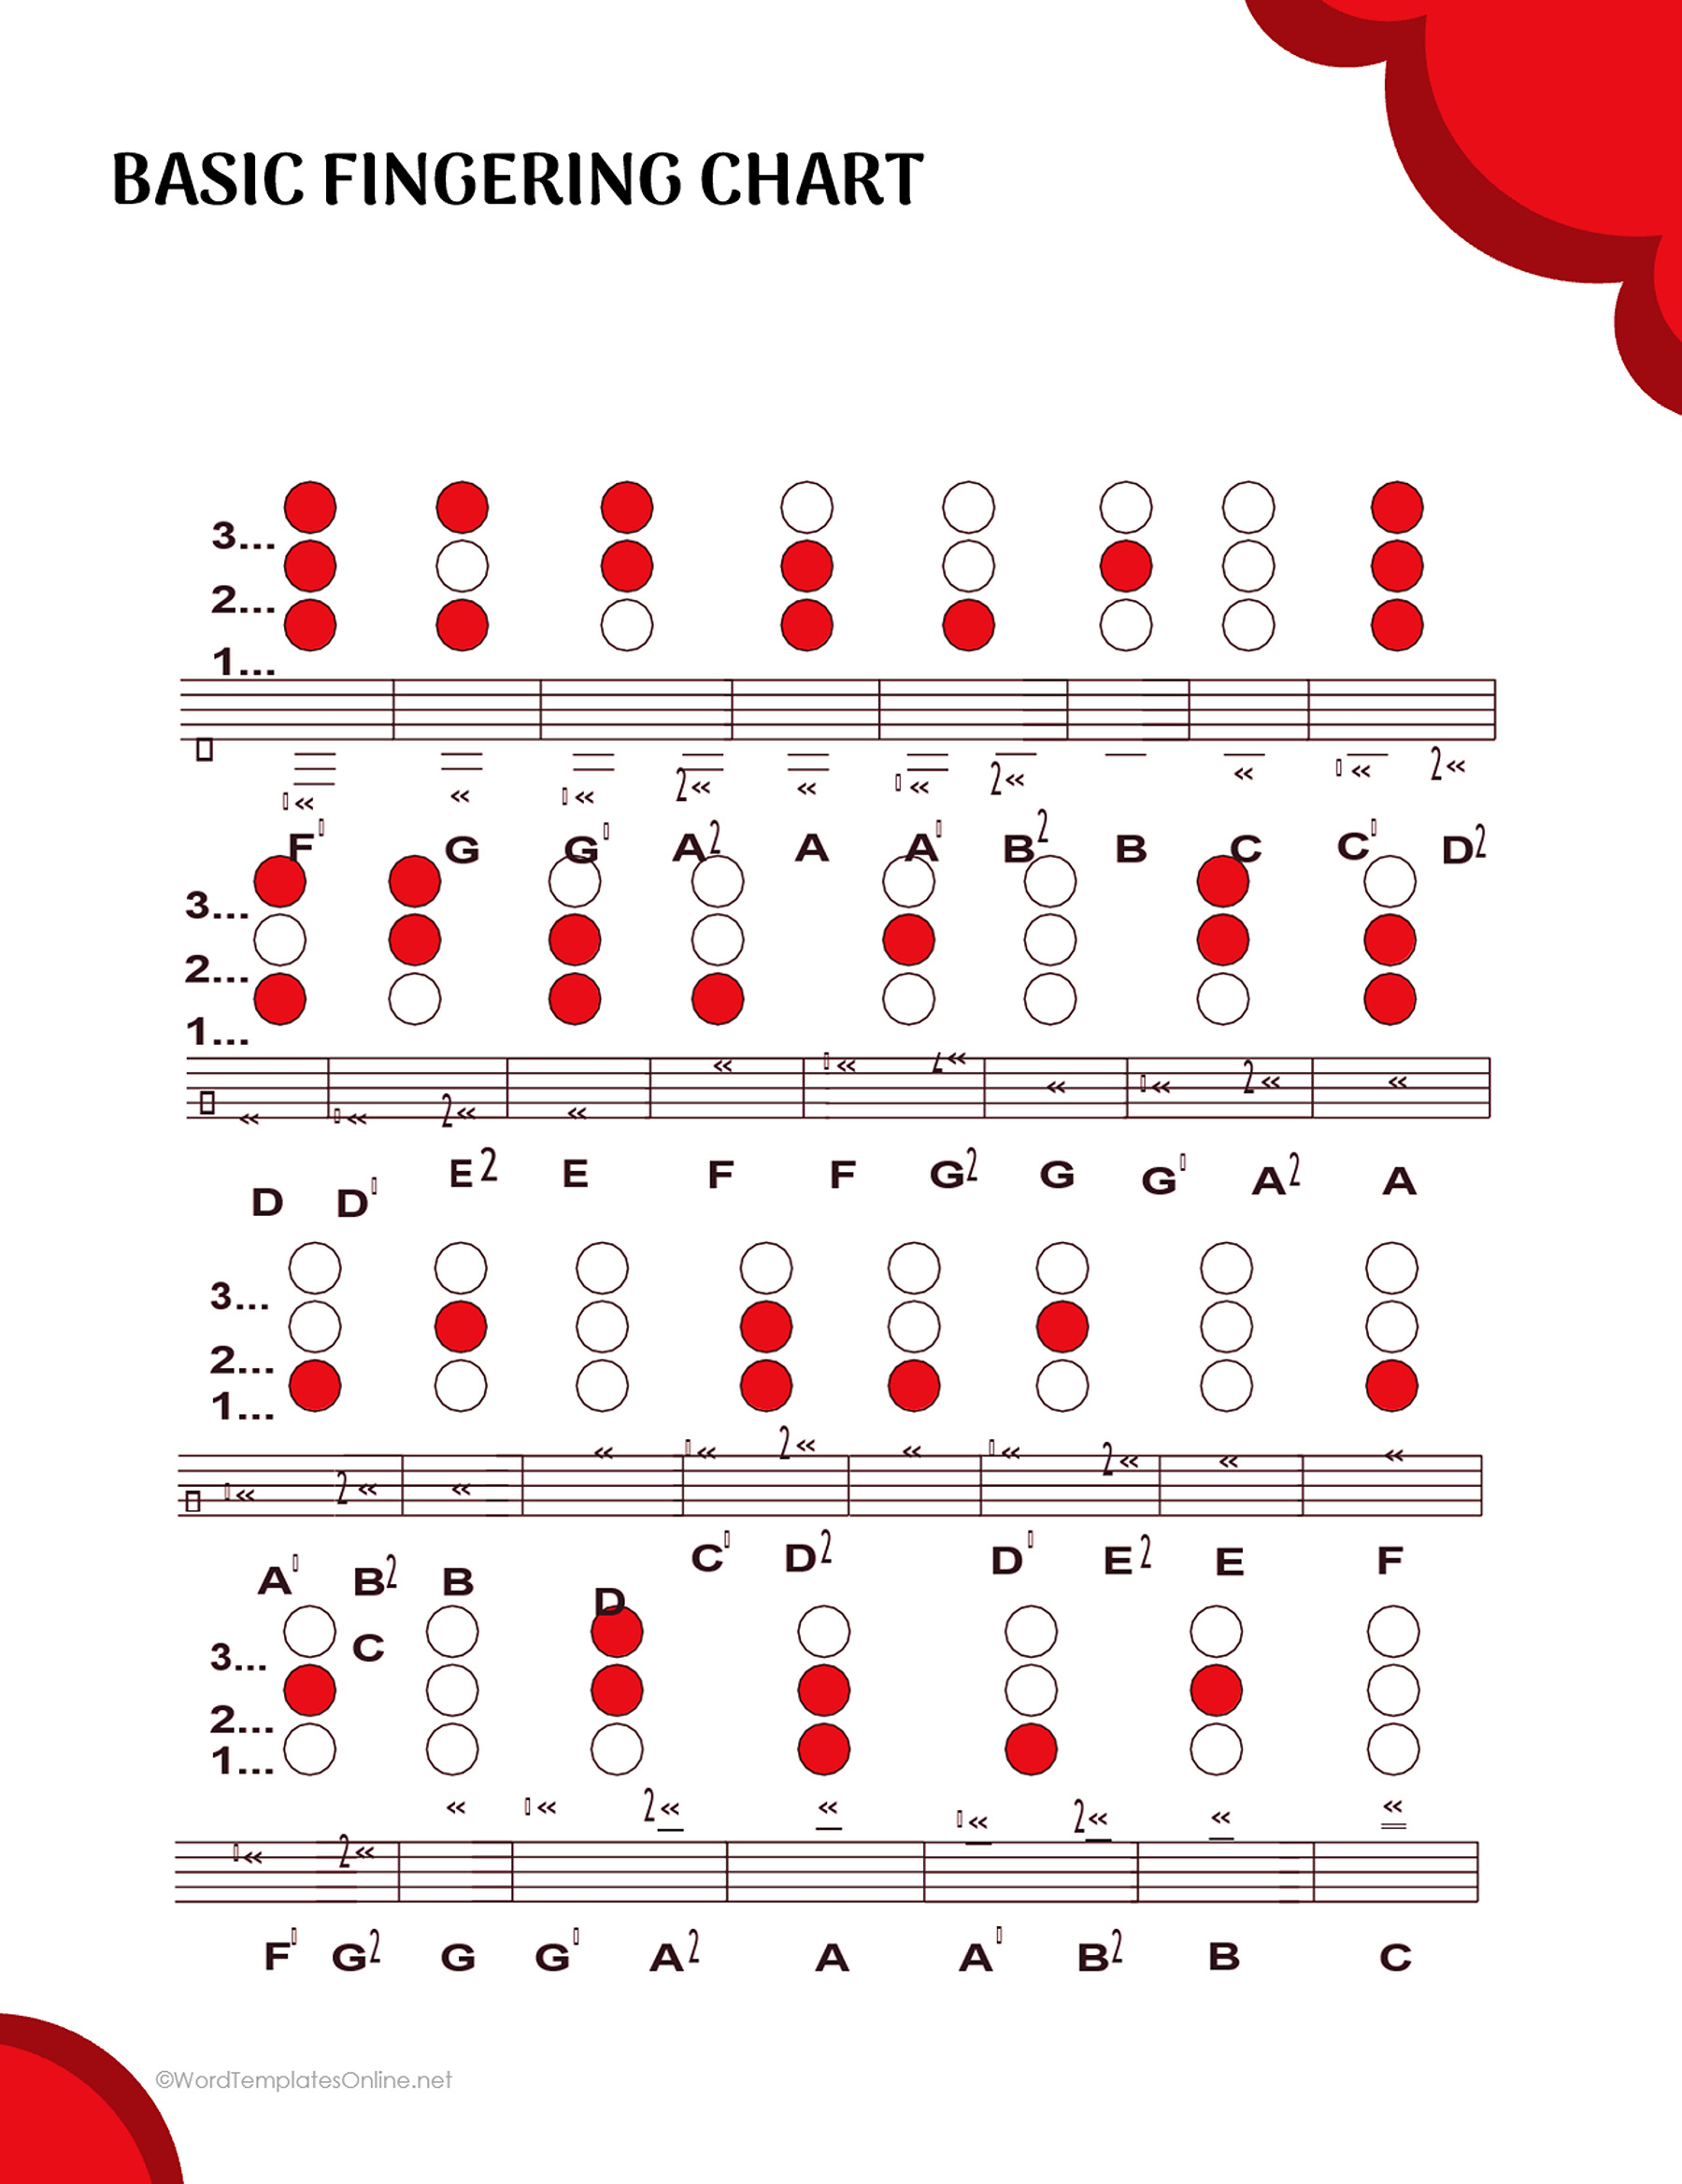
Chart 02 is a portrait design with red filled and open circles above four staff systems. It presents the valve pattern visually. Read the staff notation and the accompanying symbols together; the circles by themselves do not identify the note or its octave.
Choose a reference with a clear entry that you can compare with your instruction. The two layouts offer different ways of displaying information, so there is no need to switch to the circle design simply because it looks more visual.
Mellophone Fingering Chart 01
Mellophone Fingering Chart 02
Read valve numbers and circles together
In a numbered three-valve pattern, 1-2 means pressing valves 1 and 2 at the same time while leaving valve 3 released. It does not mean pressing valve 1 and then valve 2 in sequence. A 0 or open entry means no valves are pressed.
That small distinction is useful when you first meet a chart. If the entry says 1-2, keep both specified valves down for that note. This example explains the combination only; it does not assign it to an additional note that has not been checked in the reference.
For a circle diagram, use that chart’s legend to distinguish pressed and released valves. Don’t rely on color alone or assume that a symbol has the same meaning in every chart. Yamaha’s trumpet fingering diagrams provide a separate example of three-valve patterns and alternative combinations. They are supporting context, rather than a verification of every entry in this WTO collection.
Match the staff position, not only the letter name
The same note letter can occur in different octaves. Find where the note sits on the staff, check any accidental, and then look for that particular entry in the chart. A pitch label helps, but it should be read with the notation.
The register is the range in which the note occurs. If a chart shows the same valve pattern alongside several staff notes, the pattern alone will not tell you which of those notes to play. Keep the written note in view as you read the combination.
Start with one clear entry from your part and confirm it with your teacher. If the note or notation is unclear, use a reference your teacher can identify for the instrument and part, rather than guessing from a nearby letter label.
Use the supplied document format
Choose the DOTX option when you want to start from a Word template, the ODT option for an editor that supports OpenDocument text files, or the linked Google Docs version for a browser-based copy. Save your working document separately from the original template.
The first source combines note and name text with graphics. The second chart’s main diagram is a flattened image. Being able to edit a heading or surrounding text does not make each musical symbol an independently editable field.
Before using a copy on a music stand or printing it, inspect the staff lines, accidentals and small labels at the size you need. Select one readable entry for your actual part, check the instrument and octave, and confirm how to use it in your lesson or rehearsal.
About This Article