When making a film, multiple moving parts ought to be considered. To convey your story/script effectively, elements of great cinematography have to be employed. Cinematography involves the elements of lighting, camera movement, lens choice, and framing. One of the tools used to achieve great cinematography is a shot list.
A shot list template outlines all the shots required to make a visual narrative. This way, the production crew is aware of the different shots they must take before production begins. A shot list template uses text, sketches, reference images, and color codes to describe the shots. This article will elaborate on what a shot list is, what it entails, and when and how to prepare it.
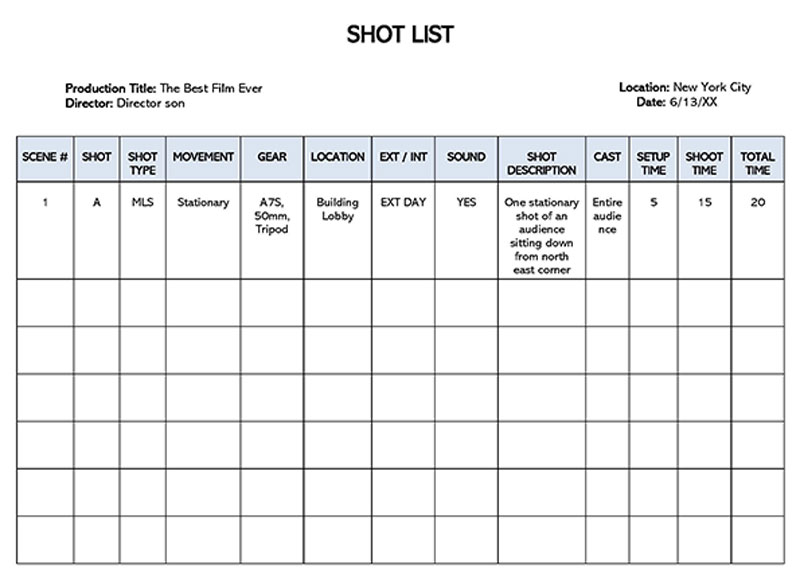
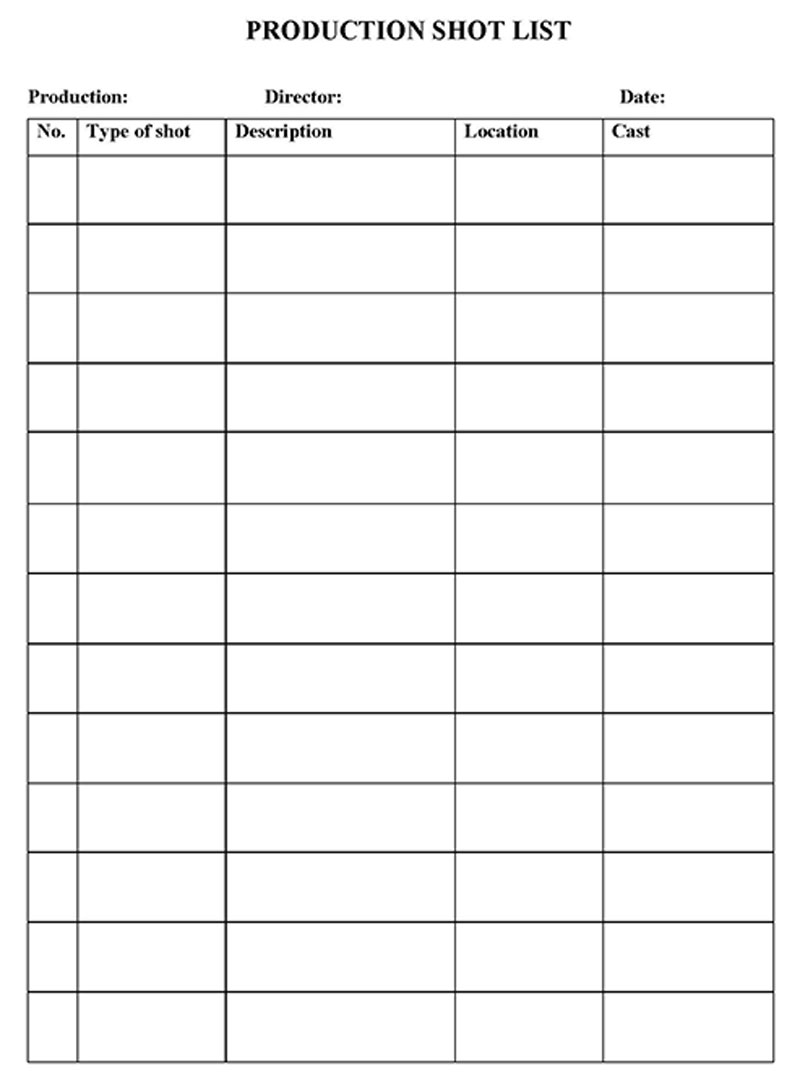
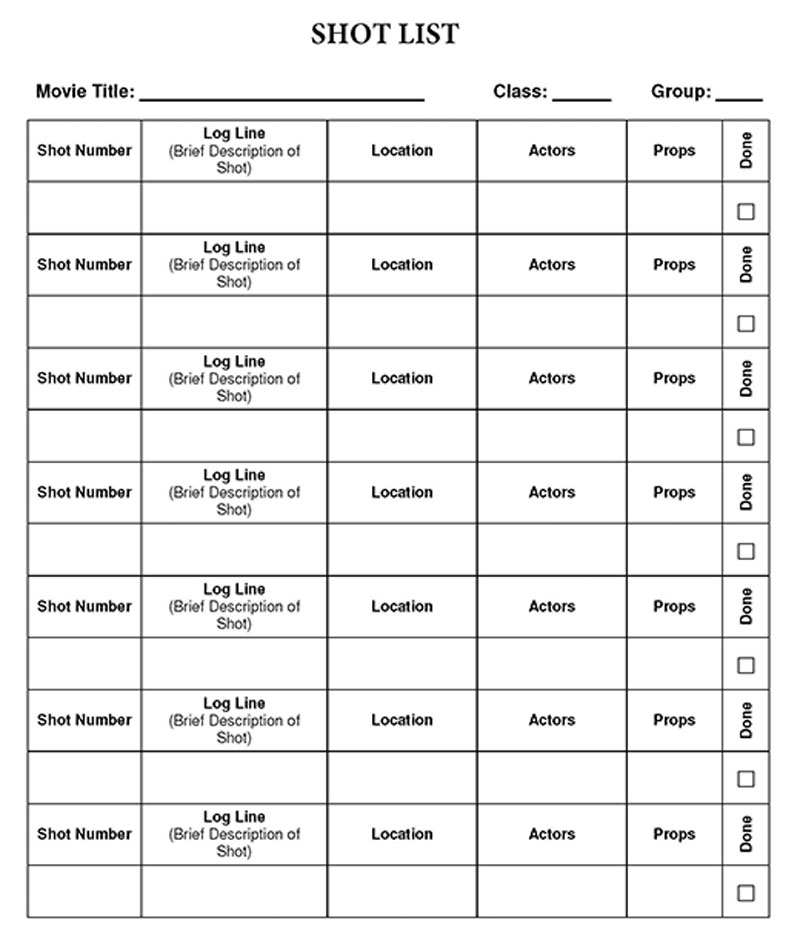
A shot list is a pre-production document that itemizes all the shots on a specific day, location, or scene.
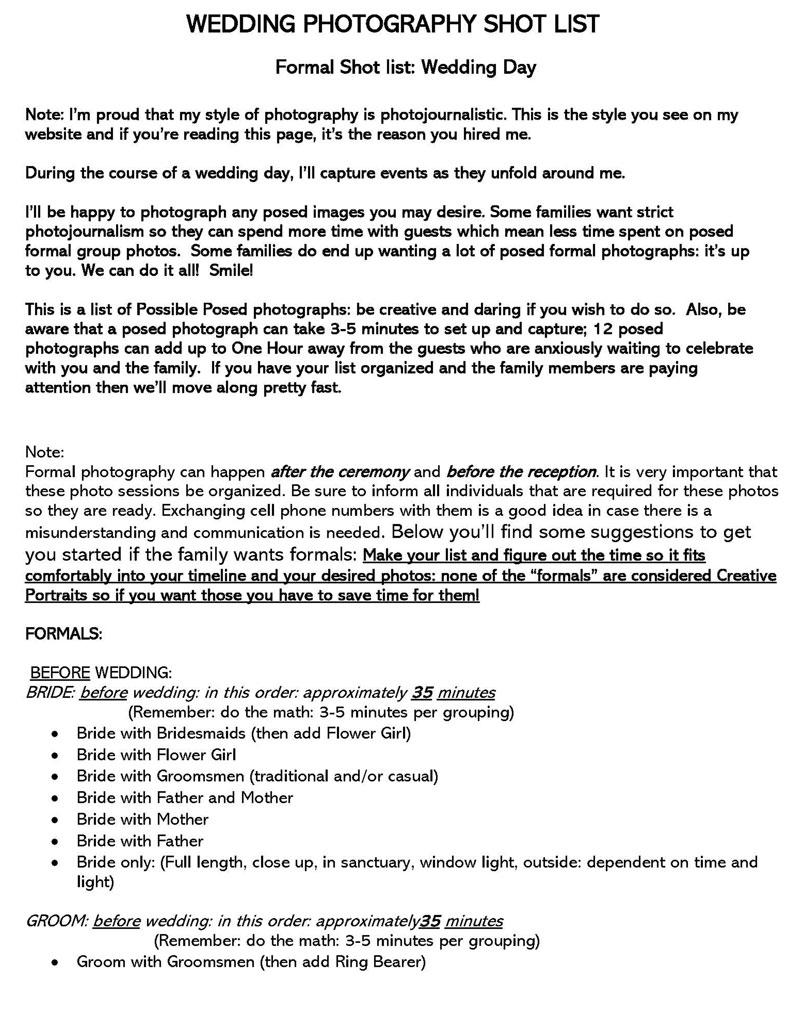
In addition, it outlines all the requirements, such as camera type, shot size, equipment, angle, etc., needed for each shot listed in the document. The director and the cinematographer prepare the document. These are not limited to movies/films; they are used in theatre, commercials, and photography shoots.
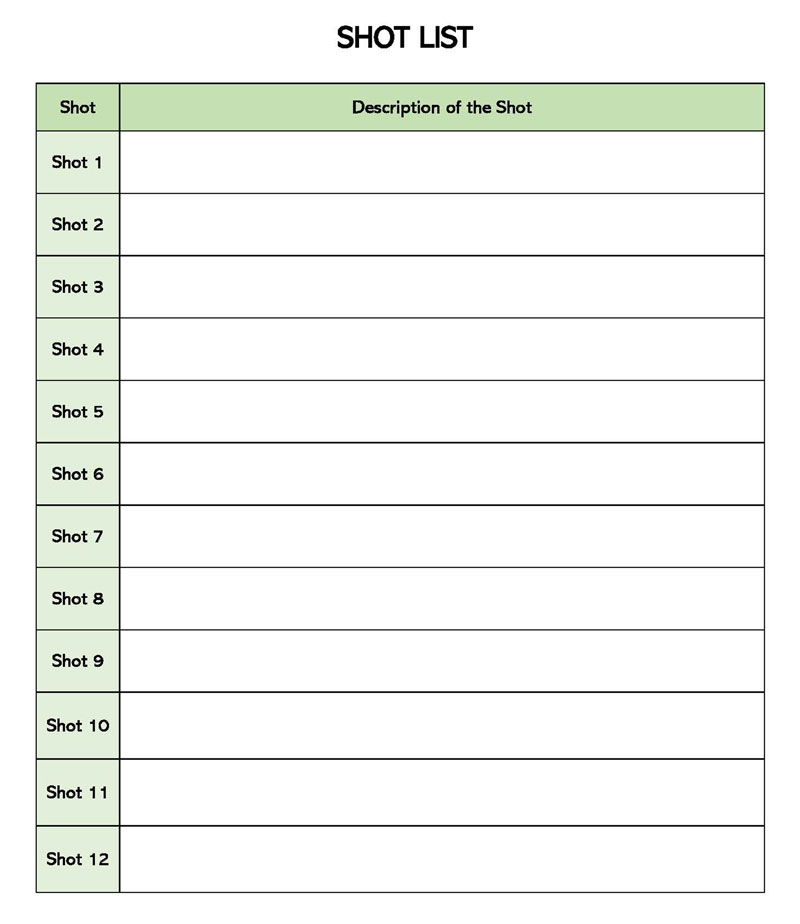
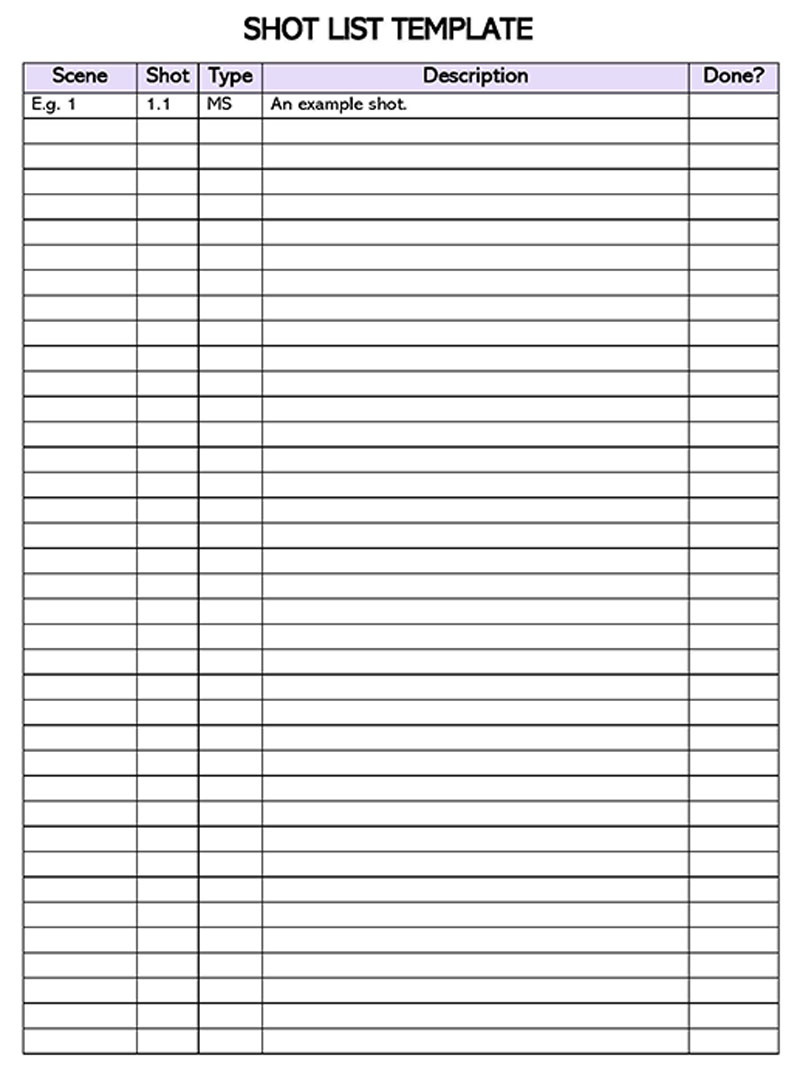
Shot List Templates


Importance of Shot List
It is an effective way of staying organized before, during, and after filming. It is vital to have the list before shooting begins to ensure that all the requirements for the different shots are mobilized. Following are a few key importance of it:
- The list is thus used to create the shooting schedule. This optimizes shooting time and saves a lot of downtime.
- During filming, the list is used as a reference tool when setting the scene, directing the actors, and determining the specifics of the actual takes.
- During editing, the list directs the editor on the specifics of each shot so that they can make edits that enhance the vision of the DP (director of photography).
- A list also guides the editor by communicating the sequence of the story since most films are not filmed sequentially.
- Since the list is issued to each department, different crews can work independently and collaborate efficiently for every shot.
Basic Structure of a Shot List
The specifics of a list vary from one film or shoot to another. However, a template will typically have consistent elements regardless.
Below are the fundamental items of a shot list template:
Scene
It should group the shots based on their respective scenes. The scene should be specified by the scene number obtained from the script. One scene can have multiple shots.
Set up
It should outline the different setups used in the shot. Setups usually stem from repositioning the camera and changing costumes or lighting. Each setup should have a unique identifying number so that similar setups can later be grouped.
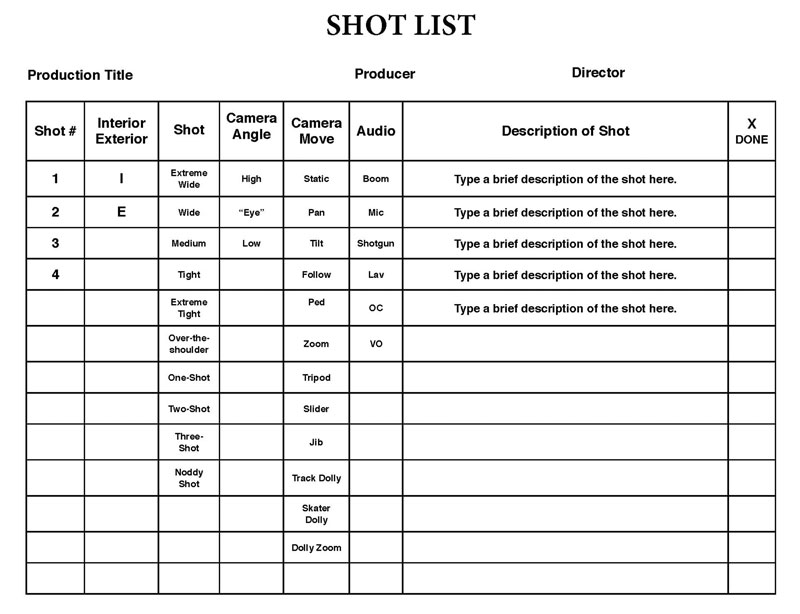
Shot
Each shot to be taken during filming should be listed in the list. If there are multiple shots with a scene or setup, each shot should be assigned a unique shot number for identification purposes. The shot number should be increased per shot and reset when the scene or setup changes.
You can also indicate the type of shot:
- WS (wide shot)
- VWS (extensive shot)
- MS (mild shot)
- MCU (medium close-up)
- CU (close up)
- ECU (extreme close-up)
Description
A description should be given for each shot detailing what is happening in the shot and at which point in the story the shot belongs. An action or dialogue can be used as the shot description. The description can involve as much information as possible, provided it guides the crew on what is happening in the shot.
Equipment
The different gears to be used in the shot should be listed. This section can outline the type of cameras and lenses and supporting equipment. Camera supporting gear includes tripod, drone, Dolly, or Steadicam.
Movement
It should also describe the camera movements used in the shot. The different camera movements include static, pan, tilt, Dolly, zoom, crane/boom, handheld, or rack focus.
Angle
The camera angle is a vital element in capturing shots. It should thus have a section to indicate the camera angle of the subject (actor, prop, or setting) that is focal to the shot. Directors use different camera angles, including eye level, high angle, low angle, tilt/Dutch angle, OTS (over the shoulder), birds-eye view, and POV (point of view).
Shot size
The shot size to be used in each should also be specified. The shot size describes the size of the subject in the frame. Varying the shot size creates different effects and adds context to the frame. The shot size will usually depend on the type of shot and vice versa. For example, if you want the subject to be smaller than the surroundings, you will use a wide shot.
Audio
It should also indicate how audio (sound and dialogue) will be recorded in a shot. The different options of capturing audio include boom, lav (s), or voiceover (VO).
Lightning
Lighting is another element that should be communicated to the filming crew through a shot list. Lighting is used to create a theme and as part of visual effects. This section can discuss the type of lighting you want for the shot and the lighting equipment. Lighting can be natural or artificial lighting.
Status
It should have a section where you mark the status of the shot. This section is used to record the progress and significance of a shot. You should mark every shot once completed. However, some shots are more critical and can thus be marked as “priority” shots to avoid delays.
Subject
Each shot is centered around a specific actor, cast (group of actors), prop, or setting. The focal point of the shot is referred to as the subject of the shot. The cast required for each shot should be identified under the shot. This helps in remaining organized, getting actors on set on time, and prepping the actors and the props.
VFX
Any VFX (visual effects) required for each shot should be outlined in the template. This section can include short notes before consultations have been made with the VFX coordinator.
Frame rate
The frame rate specifies the speed at which the shot will be captured. It can be described as expected speed, slow motion, or fast.
Location (EXT/INT)
The location where each scene is taking place should be indicated in the template. Note that shots within a scene can take place in different positions, and the shot list should therefore be specific when describing the location. The template should also show whether the shot will take place at an interior or an exterior location and if it were filmed during the day or at night.
Prep time
Prepping for each shot will take time; some shots will take longer to set up and reset than others. The shot list template should therefore indicate the estimated prep time for each shot to ensure an efficient shooting schedule is created to avoid delays. Determining the prep time is typically a collaborative effort. Therefore, you should consult department heads such as set designer, costume designer, lighting, camera crew, etc., to ensure you get an informed estimate from each department.
Shoot time
It should have a section to record the time required to shoot each shot—the shoot time factors in the time taken to capture the needed number of shots. For example, for a 20-seconds shot that requires at least four takes, its shoot time will be 80 seconds.
Total time estimate
It is crucial to consider the time needed to prepare for a shot and film it. This time represents the total time estimate for the shot. Therefore, it can be determined by adding the prep time and the shoot time for each shot. In addition, this time is used to plan the filming days to ensure activities are rationally distributed throughout the filming period.
Camera
The shot list should indicate when the camera setup should be changed. The camera setup involves changing the lens or repositioning it. Indicating the points at which each camera setup will be changed can help the camera crew prepare ahead to save time in between shots. You can also record which camera will be used for each shot in this section.
Custom notes
A good template should have a section where you can write down notes for each scene or shot. Notes can be written by the AD (assistant director) to be discussed during progress meetings for each department.
Colour coding
Color coding is another technique used to distinguish shots by scene, location, actor, or setup. The template should show what each color code used in the list represents. This makes it easier for the film crew and editors to understand the list.
Cast
All the cast members involved in each shot should be listed in the template. The cast can be described by their character names and actual names to simplify the crew to identify them.
Best take
It should have a column where you can indicate the best takes from each scene or location. The timecode of each best take should also be recorded to help the editors trace it.
Camera movements in a shot list
Contingent on what the director wants to achieve, there are different camera movements they can resort to. Below are the different camera movements found in a completed shot list template:
- Static: Static movement implies the camera is immobile (having motion). If it is fixed to a tripod, it remains in position until the shot is completed.
- Pan: Pan is used when the camera lens remains on a horizontal fixed plane as the camera moves (side to side).
- Tilt: Tilt involves rotating the camera vertically from a fixed position such that the horizontal plane of the camera gains an inclination.
- Pedestal: Tilt is motion achieved when the camera is moved vertically (up and down) – that is, given an inclination while it remains in the same horizontal position.
- Dolly: Dolly movement involves moving the camera back and forth along a rail.
- Truck: The entire camera moves from left to right on track in truck motion.
- Arc: Arc movement is achieved in combination with Dolly and truck to signify a curve in the dolly track.
- Steadicam: Steadicam motion is achieved using a Steadicam- a stabilizing camera mounted for handheld film or video shooting. The camera is thus mounted on the Steadicam.
- Handheld: Handheld movement is attained when the operator holds the camera without a stabilizer when recording the shot.
- Crane or Boom: The type of camera movement achieved when the camera starts from a low position towards a high position or vice versa, as seen in overhead shots.
- Zoom: Zoom is realized by varying the lens’s focal length, and the subject and objects either increase by scale (zoom in) or decrease by scale (zoom out).
- Rack Focus: Rack focus is when the camera quickly shifts from one subject to another with the same shot.
- Dolly Zoom: Dolly zoom is a combination of both Dolly and zoom. The camera moves forwards or backward as the view is augmented such that the subject remains the same size in the frame.
When and How to Make it?
A shot list is an effective way of getting everyone involved during filming on the same page. The document can be used in both substantial blockbuster movies and short films. Therefore, knowing when and how a template is created is crucial if you are in the film production industry.
When
It is created once you have selected your story or script. The document should thus be crafted as you prepare your storyboard before production begins. As filming continues, you can modify the shot list to cope with changes in production. You can add notes in the shot list detailing essential points you want to bring to the attention of the filming crew and editors.
How
It should be easy to interpret. You, therefore, have to be transparent on what you want to be done in every shot. You can abide by the steps given below to develop an effective template:
- Picking and designing your shots: Your first action should be to select and visualize your shots. This can be done in collaboration with the respective director of photography. Often, the conceptualization stage will take the most time. However, it saves you time going forward into production if done correctly.
- Organizing and scheduling those shots: Once all the shots have been identified, you can list them. The shots can be categorized based on setups, scenes, or location. Once all the shots have been grouped, you should reorder them in the most efficient order. You can then create a schedule for the shots.
Final Remarks
A shot list is inevitable in film production. Knowing how to create and interpret the shot list helps you carry out your assigned role on set. As much as you should strive to craft an excellent template, you should keep in mind that the document is subject to adjustments, and some things can go slightly wrong, and this does not imply your list failed. Always keep in mind film production relies on several moving parts, and unforeseen setbacks are inevitable.
A shot list template does not always have to be too detailed. However, you should be able to assess the situation and determine what information will be necessary to guide the filming crew and modify the list to meet your specific needs.
About This Article